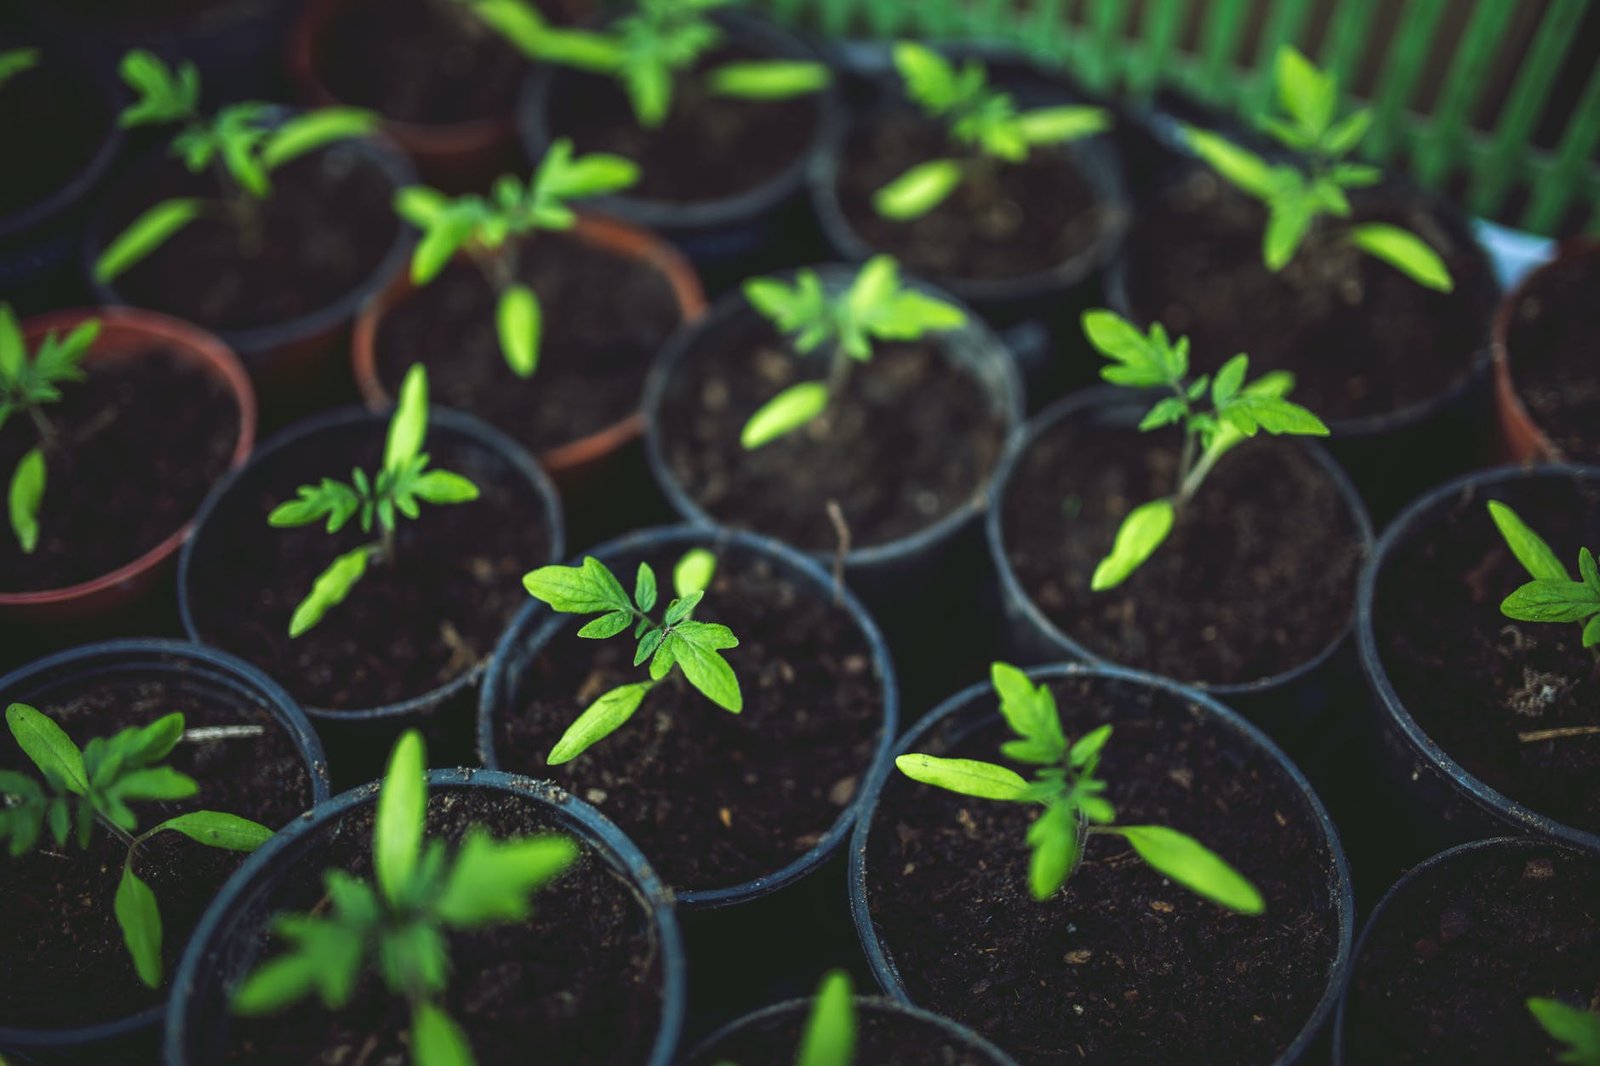

organic farming: In today’s life, we can see that organic farming is getting very popular and people are more into it, organic refers to the method by which farmers grow fruits, vegetables, and grains, etc. People in the whole world are now asking and using organic products.

Organic farming helps in
- soil and water quality
- Reduce pollution
- Provide safe, healthy habitats
- Enable natural behavior
- Promote a self-sustaining cycle of resources on a farm
In organic farming we should avoid
- Synthetic fertilizers
- Sewage sludge as fertilizer
- Most synthetic pesticides
- Irradiation to preserve food or to eliminate disease or pests
- Antibiotics or growth hormones
The items which has to be included in organicaly
- Plant waste
- Cover crops that prevent erosion
- Control weeds
- Insect traps to control pests
- Can also use natural pesticides
In short, we can say that organically farming is helpful to our environment and soil in all respect, it also helps to reduce health issues.
Types of organic farming
- Integrated organic farming.
his consists of integrating pest management and nutrients management to achieve their requirements
- Pure organic farming
Here farming includes natural ways for cultivation
🔥 Our Trending Gardening Picks
In the future, we can say that organic will be the only method for farming.
Few thing we can say about organic are
- no expensive fertilizers, pesticides, or HYV seeds are required for the plantation of crops.
- a farmer can make a good return on investment.
- huge demand for organic products
- more nutritional
- no harm for environment.
Disadvantage of farming
- Less output.
- Higher price.
- The lack of awareness.
- Organic products generally demand a higher price due to a higher demand.
- Shorter shelf life.
- Organic products have a shorter shelf life
Organic is a new system of farming or agriculture that repairs, maintains, and improves the ecological balance.
DIFFERENCE BETWEEN ORGANIC AND NON-ORGANIC FOODS
Organic foods are foods that do not contain any chemical food additives, in addition to not employing synthetics throughout the manufacturing process.
Non-organic foods contain chemicals, synthetic chemicals are placed on a crop or product to stimulate its growth.
| Pros | Cons |
| Protection from animals | Loss of competitiveness of small farmers |
| Water savings | Time-consuming |
| Fewer crop imports are necessary | bad smell |
| Efficient land use | Significant swings in quality and yields |
what is organic farming?
- how deep to plant potatoes
 how deep to plant potatoes How Deep to Plant Potatoes The humble potato, a staple in kitchens across the globe and a versatile vegetable loved by all, holds a special place in the hearts of Bengaluru gardeners. There’s an unparalleled satisfaction that comes from digging up your very own, homegrown spuds – fresh, earthy, and bursting with flavour, far superior to anything you can buy in the market. But achieving that bountiful harvest isn’t just about good soil and regular watering; it hinges significantly on one often-overlooked yet critically important factor: how deep you plant your potatoes. Many enthusiastic gardeners, especially those new to growing root vegetables in our unique Bengaluru climate, stumble at this crucial first step, leading to disappointing yields, sun-damaged tubers, or even complete crop failure. Planting depth isn’t just a random number; it’s a science-backed decision that directly impacts everything from tuber formation and protection to moisture retention and overall plant health. Imagine investing time, effort, and precious garden space only to find your potatoes struggling because they were either too shallow, exposed to the harsh Indian sun and turning green with solanine, or too deep, hindering their initial growth and struggling to emerge. The benefits of getting this right are immense: significantly higher yields of healthy, delicious potatoes, reduced risk of common potato diseases, optimal moisture utilization (a boon in Bengaluru’s varied weather patterns), and a more robust, resilient plant from the get-go. This isn’t just about digging a hole; it’s about setting the stage for success, understanding the unique growth habit of the potato, and giving it the best possible start to thrive in our local conditions. Whether you’re working with a small urban balcony, a traditional garden bed, or even experimenting with grow bags, mastering the art and science of potato planting depth is your secret weapon for a truly rewarding harvest. Throughout this comprehensive guide, we’ll delve into the intricacies of potato planting, tailored specifically for the Bengaluru gardener, ensuring your potato patch becomes the envy of your neighbourhood. 🔥 Our Trending Gardening Pickshow deep to plant potatoesdo plant cells have mitochondriawhen to plant garlicwhat to plant with tomatoeswhat plants like coffee grounds The Science Behind Potato Planting Depth: Why It Matters So Much Understanding the underlying biological processes of the potato plant is key to appreciating why planting depth is such a critical factor. Potatoes aren’t true roots; they are modified stems called tubers, which develop from underground stems known as stolons. This unique growth habit dictates much of our planting strategy. When you plant a seed potato, the sprouts emerge upwards, but crucially, the new tubers form *above* the original seed potato, along the stolons that develop from the buried stem. This is where depth plays its most vital role. Tuber Formation and Stolons When you plant your seed potato, the primary goal is to encourage strong root development downwards and vigorous shoot growth upwards. However, the magic of potato production happens along the stolons that branch out from the buried stem. If the seed potato is planted too shallowly, the stolons will form too close to the soil surface, resulting in smaller tubers and fewer of them. Deeper planting, or rather, the process of gradually burying the emerging stems (known as hilling), encourages the plant to produce more stolons and form tubers in a larger, protected zone beneath the soil. This provides ample space for tubers to expand without becoming exposed, leading to a more abundant harvest of well-formed potatoes. The process is remarkably efficient when the plant has the right conditions, and initial depth is foundational to these conditions. Protection from Greening and Pests One of the most common issues with shallowly planted potatoes is “greening.” This occurs when tubers are exposed to sunlight, triggering the production of chlorophyll (hence the green colour) and solanine, a bitter glycoalkaloid that can be toxic in large quantities. Green potatoes are not only unpalatable but can also be harmful, making them unfit for consumption. Proper planting depth, coupled with diligent hilling, ensures that the developing tubers remain consistently covered by soil, shielding them from the sun’s rays. Furthermore, a good layer of soil acts as a physical barrier against certain pests, such as potato tuber moths, which can lay eggs on exposed tubers, leading to damage. While not a complete deterrent, deeper planting offers an initial layer of protection against these common garden adversaries, which can be particularly active in Bengaluru’s warm climate. For more on pest management, check out https://ecorganicas.org/category/organic/. Moisture and Temperature Regulation Bengaluru’s climate can be quite unpredictable, with periods of intense heat and sometimes sudden, heavy downpours. The soil’s ability to retain moisture and maintain a stable temperature is paramount for healthy potato growth. Shallowly planted potatoes are more susceptible to rapid moisture loss, requiring more frequent watering, which can be wasteful and time-consuming. Deeper planting places the tubers in a more stable environment where soil moisture is conserved more effectively. The surrounding earth acts as an insulator, protecting the developing tubers from extreme temperature fluctuations – keeping them cooler during hot spells and providing a buffer against sudden cold snaps, although the latter is less common in our region. This consistent environment minimizes stress on the plant, allowing it to focus its energy on producing tubers rather than battling environmental extremes. Root Development and Nutrient Uptake A deeper planting depth also encourages a more robust and extensive root system. While tubers form on stolons, a strong root system is essential for anchoring the plant, absorbing water, and taking up vital nutrients from the soil. A plant with a well-developed root system is inherently healthier, more resilient to drought, and better equipped to resist diseases. The deeper roots can access a wider range of nutrients present at various soil levels, leading to more vigorous plant growth and ultimately, larger, healthier potatoes. This foundational strength is crucial for sustained growth throughout the potato’s relatively long growing season, ensuring that your plants can tap into the rich organic matter you’ve prepared for them. Standard Planting Depths for Different Potato Varieties While the general rule of thumb for potato planting depth remains fairly consistent, there are subtle nuances to consider, especially when dealing with different potato varieties and their growth habits. Potatoes are broadly categorized into early-season, mid-season, and late-season varieties, each with slightly different requirements that can influence your initial planting depth. Understanding these distinctions can optimize your yield and ensure you’re providing the best possible start for your chosen spuds. Early-Season Potatoes Early-season varieties, often referred to as “new potatoes,” are bred to mature quickly, typically within 60-80 days. These include popular types like Kufri Jyoti, which is widely cultivated in India, known for its adaptability and good yield. Since they have a shorter growing period, they don’t require as much vertical space for tuber development as their later-maturing counterparts. For early-season potatoes, an initial planting depth of about 4-6 inches (10-15 cm) is generally recommended. This allows them to emerge quickly and begin forming tubers relatively close to the surface, which is fine as they are harvested before excessive exposure becomes a major issue. However, hilling is still crucial for these varieties to prevent greening and encourage more tubers, even if done with slightly less frequency or material. They benefit from quick soil warming, and a slightly shallower initial depth can aid in this, especially after Bengaluru’s cooler winter months transition into spring. Mid-Season and Late-Season Potatoes Mid-season varieties mature in 80-100 days, while late-season varieties can take 100-130 days or even longer. These include robust types like Kufri Sindhuri or Kufri Badshah, favoured for their larger size and excellent storage qualities. Because these varieties have a longer period for growth and tuber development, they benefit significantly from deeper initial planting. An ideal initial depth for mid-season and late-season potatoes is typically 6-8 inches (15-20 cm). This greater depth provides ample space for the stolons to extend and form a larger number of tubers further away from the soil surface. The deeper start also offers enhanced protection against sun exposure and better moisture retention over their extended growing period, which is particularly advantageous during Bengaluru’s often dry spells between monsoons. The aim here is to set them up for continuous tuber production throughout their longer life cycle, maximizing the potential for a substantial harvest of large, healthy potatoes. The Role of Chitting (Sprouting) Regardless of the variety, preparing your seed potatoes by “chitting” them before planting can influence their initial growth. Chitting involves exposing seed potatoes to indirect light in a cool, well-ventilated area for a few weeks until they develop short, sturdy green sprouts (chits). While chitting doesn’t directly change the recommended planting depth, it gives the potato a head start, meaning it will emerge from the soil more quickly. When planting chitted potatoes, be careful not to break off the delicate sprouts. You can gently place them in the prepared trench or hole, ensuring the chits are pointing upwards. The initial depth remains the same, but the plant’s emergence will be faster and more vigorous, which can be particularly beneficial for early-season varieties looking to gain a quick start. For more information on chitting, refer to https://ecorganicas.org/pill-bugs-in-garden/. Planting Methods and Depths: Beyond the Basics While the standard trench method is widely known, modern gardening, especially in urban settings like Bengaluru, offers a variety of techniques for growing potatoes. Each method has its unique approach to planting depth and subsequent care, catering to different space constraints, soil conditions, and gardener preferences. Understanding these variations allows you to choose the best method for your specific gardening setup, maximizing your chances of a successful potato harvest. Trench Planting: The Traditional Approach Trench planting is the most traditional and often recommended method for growing potatoes in a garden bed. It involves digging a trench, placing the seed potatoes, and then gradually filling the trench as the plant grows – a process known as hilling. Initial Depth: For trench planting, dig a trench approximately 6-8 inches (15-20 cm) deep and about 6-12 inches (15-30 cm) wide. Place your chitted seed potatoes cut-side down (if cut) or with sprouts facing upwards, about 10-12 inches (25-30 cm) apart in the trench. Cover them with just 3-4 inches (7-10 cm) of loose soil or a mix of soil and compost. This initial shallow cover allows the sprouts to emerge easily. Hilling: As the potato plants grow and reach about 6-8 inches (15-20 cm) tall, you begin the hilling process. Gradually add more soil, compost, or straw around the base of the plant, burying about two-thirds of the stem, leaving only the top leaves exposed. Repeat this process every time the plant grows another 6-8 inches, until the trench is filled and you’ve created a mound around the plants. This continuous hilling essentially creates a deeper planting environment over time, encouraging more stolons and tubers to form higher up the stem. Container and Grow Bag Planting: Urban Gardening Solutions For Bengaluru’s urban gardeners with limited space, containers and grow bags are excellent alternatives. They offer portability and control over soil conditions, but require a slightly different approach to depth management. Initial Depth: In a large container or grow bag (at least 15-20 gallons or 60-75 litres for good yield), place 4-6 inches (10-15 cm) of well-draining potting mix at the bottom. Position 1-3 seed potatoes (depending on container size) on top of this layer. Cover them with another 4-6 inches of potting mix. This initial depth is crucial as it leaves plenty of room for subsequent layering. Layering/Hilling: As the potato plants grow to about 6-8 inches tall, add more potting mix, compost, or even straw, burying most of the stem and leaving only the top leaves exposed. Continue this layering process as the plant grows, effectively hilling within the container. Fill the container or grow bag gradually until it’s almost full, ensuring the developing tubers remain consistently covered. This method mimics trench hilling but provides more control over the growing medium. Raised Beds: Drainage and Soil Control Raised beds are a fantastic option for better drainage, easier soil amendment, and warmth, often preferred by Bengaluru gardeners. Managing potato depth in raised beds combines elements of trench and flat-bed planting. Initial Depth: In a raised bed, you can plant your seed potatoes directly into the prepared soil at a depth of 6-8 inches (15-20 cm), similar to a traditional garden bed. Ensure good spacing (12-15 inches apart) to allow for plant growth and hilling. The excellent drainage of raised beds means you’re less likely to have issues with waterlogging, which can be a concern with deeper planting in heavy soils. Hilling: Just like with trench planting, hilling is essential in raised beds. As plants grow, draw up soil from between the rows or add fresh compost/soil from outside the bed to mound around the base of the plants. The generous depth of most raised beds provides ample material for multiple hilling sessions, contributing to a robust yield. For tips on building your own raised bed, see https://ecorganicas.org/pill-bugs-in-garden/. No-Dig/Lasagna Method: Layered Depth The no-dig method, or “lasagna gardening,” involves building up layers of organic matter directly on the ground. This method naturally creates depth through accumulation. Initial Depth: In a no-dig bed, you don’t dig a trench. Instead, you can place your seed potatoes directly on a relatively thick initial layer of compost or partially decomposed organic matter. Then, cover them with another 6-8 inches (15-20 cm) of rich compost, straw, or leaf mould. This acts as your initial “planting depth.” Layering/Hilling: As the potato plants grow, you continue to add layers of organic material (straw, compost, aged manure, leaves) around the base of the plants. This continuous layering effectively hills the potatoes, providing a loose, nutrient-rich environment for tuber development. The beauty of this method is the continuous supply of organic matter, which feeds the soil and plants while simultaneously providing the necessary depth for tuber formation. The Art of Hilling: A Crucial Step for Bountiful Harvests While initial planting depth sets the stage, the process of “hilling” is arguably just as, if not more, important for maximizing potato yields and ensuring tuber quality. Hilling is the practice of drawing soil, compost, or other organic material around the base of your growing potato plants as they mature. It’s a technique that has been passed down through generations of gardeners for good reason – it directly addresses the unique way potatoes produce tubers and protects them from common problems. Preventing Greening and Maximizing Yield The primary reason for hilling is to keep developing potato tubers covered and protected from sunlight. As discussed earlier, exposure to light causes potatoes to produce chlorophyll (turning them green) and solanine, making them inedible. Hilling ensures that as new tubers form on the stolons above the original seed potato, they remain buried deep within the soil, safe from the sun’s harmful rays. Beyond preventing greening, hilling actively encourages the plant to produce more tubers. Each time you mound soil around the stem, you essentially create more stem surface area underground. This buried stem tissue then has the potential to produce more stolons, and consequently, more potatoes. It’s a method of tricking the plant into thinking it needs to produce more “roots” (tubers) higher up the stem, leading to a significantly larger harvest from each plant. Think of it as giving your potato plant more “real estate” underground to expand its family. When and How to Hill Timing is crucial for effective hilling. The first hilling should typically occur when your potato plants are about 6-8 inches (15-20 cm) tall. At this point, gently draw up loose soil, compost, or well-rotted manure around the base of the plant, burying approximately two-thirds of the stem, leaving only the top few inches of leaves exposed. Be careful not to damage the delicate stems or roots during this process. The material you use for hilling can vary. While garden soil is the most common, enriching it with compost provides additional nutrients and improves soil structure. Some gardeners also use straw, leaf mould, or a mix of these. Straw is excellent for insulation, moisture retention, and weed suppression, and it makes harvesting easier later on. However, ensure it’s free of weed seeds. The hilling process should be repeated every time the plants grow another 6-8 inches, usually 2-3 times throughout the growing season, until the plants are quite substantial and the mounds are high. For large garden beds, you can use a hoe or spade to draw soil from between the rows. In smaller spaces or raised beds, you might need to bring in additional soil or compost from outside the bed. Regular inspection of your potato patch will tell you when it’s time for the next hilling session – look for emerging stems that are getting taller and for any signs of tubers trying to peek through the soil. Hilling in Different Systems The principle of hilling remains the same across various planting methods, but the execution adapts to the specific setup: Trenches: As outlined earlier, you gradually fill the initial trench, eventually creating a mound over the row. Containers/Grow Bags: You add layers of potting mix, compost, or straw as the plant grows, filling the container from the bottom up. This is a very controlled way to hill, ideal for urban settings. Raised Beds: Similar to trench planting, you draw soil from within the bed or add external material to create mounds around the plants. The depth of raised beds usually offers ample soil for this. No-Dig/Lasagna Beds: Hilling is achieved by continually adding layers of organic matter around the plants, which naturally breaks down to feed the soil. Regardless of your chosen method, consistent hilling is a non-negotiable step for any gardener aiming for a truly successful and abundant potato harvest. It’s a simple act that yields significant rewards. You can find more comprehensive guidance on soil amendments in our article on https://ecorganicas.org/pill-bugs-in-garden/. Factors Influencing Your Planting Depth Decision While general guidelines…
 - do plant cells have mitochondria
 do plant cells have mitochondria Do Plant Cells Have Mitochondria? As a passionate gardener in Bengaluru, have you ever paused to truly appreciate the intricate life happening within your beloved plants? Beyond the vibrant blooms of hibiscus, the lush green of your mango tree, or the humble brinjal plant thriving in your kitchen garden, lies a microscopic world of incredible complexity and efficiency. We often marvel at photosynthesis, the miraculous process by which plants harness sunlight to create their own food, turning our gardens into verdant oxygen factories. But there’s another, equally vital process occurring constantly, day and night, in every living cell of your plants – one that ensures all that captured energy is actually put to good use. This brings us to a fundamental question that often sparks curiosity among green thumbs and budding botanists alike: do plant cells have mitochondria? Understanding the answer to this question isn’t just an academic exercise; it’s a profound insight into the very essence of plant vitality. It unlocks a deeper comprehension of why some plants flourish while others struggle, why certain gardening practices yield spectacular results, and how you can become a more intuitive and effective plant parent. Imagine your plants not just as passive recipients of water and sunlight, but as bustling biological factories, each cell a miniature city with specialized organelles working in perfect synchrony. The mitochondrion, often dubbed the “powerhouse of the cell,” plays a central, indispensable role in this cellular metropolis. It is the engine that converts the sugars produced during photosynthesis into a usable form of energy, powering everything from root growth and nutrient uptake to flowering, fruiting, and even defending against pests and diseases. For us gardeners in Bengaluru, where diverse plant species thrive under varying conditions – from the intense summer heat to the rejuvenating monsoon rains – grasping this cellular machinery offers immense benefits. It helps us appreciate the critical balance required for optimal plant health. If you’ve ever wondered why good soil aeration is crucial, or why proper watering prevents root rot, or how your compost pile contributes to vibrant plant growth, the answer often lies in the efficient functioning of these tiny cellular components. When mitochondria are healthy and functioning optimally, your plants exhibit robust growth, stronger resistance to environmental stressors like Bangalore’s occasional water scarcity or sudden pest outbreaks, and a prolific display of flowers and fruits. Conversely, impaired mitochondrial function can lead to stunted growth, yellowing leaves, poor yield, and increased susceptibility to various ailments. By diving into the world of plant cellular respiration, we gain the knowledge to cultivate not just beautiful gardens, but truly thriving, resilient ecosystems right in our backyards or balconies. This journey into plant cell biology is not just about science; it’s about empowering you with the insights to nurture life more effectively and witness the astonishing capabilities of nature firsthand. The Answer: Yes, Plant Cells Have Mitochondria! Let’s cut straight to the chase: the unequivocal answer is a resounding yes, plant cells absolutely have mitochondria! This might come as a surprise to some, who often associate plants primarily with chloroplasts and photosynthesis, forgetting that plants, like all living organisms, require a constant supply of energy to survive and grow. Mitochondria are fundamental, membrane-bound organelles found in the cytoplasm of virtually all eukaryotic cells, including those of plants, animals, fungi, and protists. They are evolutionary marvels, believed to have originated from free-living bacteria that were engulfed by ancestral eukaryotic cells billions of years ago, forming a symbiotic relationship that persists to this day. This fascinating origin story, known as the endosymbiotic theory, explains why mitochondria have their own small circular DNA, ribosomes, and can even divide independently within the cell. 🔥 Our Trending Gardening Pickshow deep to plant potatoesdo plant cells have mitochondriawhen to plant garlicwhat to plant with tomatoeswhat plants like coffee grounds In a plant cell, while chloroplasts are busy capturing light energy and converting it into chemical energy in the form of glucose, mitochondria take over the crucial task of transforming that glucose into a universally usable energy currency called adenosine triphosphate (ATP). Think of it this way: chloroplasts are like the solar panels that generate raw electricity (glucose), and mitochondria are the power plants that convert that raw electricity into a form that can run all the appliances (cellular processes) in the house. Without mitochondria, the glucose produced by photosynthesis would be locked away, unusable, and the plant would quickly perish. Every single metabolic process, from the synthesis of new proteins and DNA to the active transport of nutrients across cell membranes and the intricate dance of cell division, demands ATP. Even the simple act of a root hair absorbing water and minerals from the red earth of Bengaluru requires energy supplied by mitochondria. Their presence underscores a foundational biological principle: all complex life requires a dedicated system for efficient energy conversion, regardless of whether that organism also performs photosynthesis. While plant cells share many similarities with animal cells in terms of having a nucleus, endoplasmic reticulum, Golgi apparatus, and ribosomes, their distinct features like a cell wall, a large central vacuole, and, of course, chloroplasts, often overshadow the universal presence of mitochondria. However, it’s precisely the interplay between chloroplasts and mitochondria that makes plant cells so unique and self-sufficient, capable of sustaining life by converting inorganic matter into organic compounds and then efficiently utilizing those compounds for growth and maintenance. Understanding this basic truth is the first step towards truly appreciating the incredible biology underpinning every leaf, stem, and root in your garden. The Powerhouses of the Plant World: Cellular Respiration To truly grasp the significance of mitochondria in plant cells, we must delve into the process they orchestrate: cellular respiration. This is the metabolic pathway through which cells break down organic molecules (primarily glucose, which plants produce during photosynthesis) to release energy in the form of ATP. It’s often simplified as the reverse of photosynthesis, and while that’s an oversimplification, it effectively highlights the complementary nature of these two vital processes. In essence, cellular respiration is how plants “breathe” at a cellular level, consuming oxygen and releasing carbon dioxide, much like animals do, but with a unique internal balance. The overall chemical equation for aerobic cellular respiration is strikingly simple: C₆H₁₂O₆ (Glucose) + 6O₂ (Oxygen) → 6CO₂ (Carbon Dioxide) + 6H₂O (Water) + Energy (ATP). This energy, ATP, is the universal currency that powers virtually every activity within the plant. From the moment a seed germinates in the fertile soil of Karnataka to the day a mature fruit ripens on the branch, every growth spurt, every repair of damaged tissue, every defense mechanism against a fungal infection, and every synthesis of complex molecules relies on the ATP generated by mitochondria. The process is divided into three main stages: Glycolysis: This initial stage occurs in the cytoplasm, outside the mitochondria. Glucose is broken down into two molecules of pyruvate, producing a small amount of ATP and NADH (another energy-carrying molecule). This step doesn’t require oxygen. Krebs Cycle (Citric Acid Cycle): The pyruvate molecules then enter the mitochondria. Here, they are further broken down in a cyclical series of reactions, releasing more CO₂ and generating additional ATP, NADH, and FADH₂ (another energy carrier). This stage is crucial for extracting more energy from the glucose derivatives. Oxidative Phosphorylation (Electron Transport Chain): This is the grand finale, where the bulk of ATP is produced. The NADH and FADH₂ molecules generated in the previous stages deliver their high-energy electrons to a series of protein complexes embedded in the inner mitochondrial membrane. As electrons pass along this chain, energy is released and used to pump protons, creating a gradient. The flow of these protons back across the membrane drives the synthesis of large quantities of ATP. This stage absolutely requires oxygen as the final electron acceptor. Understanding cellular respiration highlights why factors like proper soil aeration are so crucial for root health. Roots don’t photosynthesize; they rely entirely on cellular respiration for their energy needs. If the soil becomes waterlogged, oxygen availability decreases drastically, impeding the final, most energy-productive stage of respiration. This leads to reduced ATP production, which in turn impairs nutrient uptake, water absorption, and overall root growth, ultimately stressing the entire plant. So, the robust growth of a chilli plant in your Bengaluru garden is directly linked to the efficient functioning of these tiny powerhouses, tirelessly converting stored chemical energy into life-sustaining ATP. For more on how plants create their initial energy source, explore our article on https://ecorganicas.org/category/organic/. Mitochondria vs. Chloroplasts: A Dynamic Duo One of the most fascinating aspects of plant biology is the remarkable partnership between mitochondria and chloroplasts. While both are membrane-bound organelles with their own DNA and play pivotal roles in energy conversion, their functions are distinctly complementary. Often, when we think of plant energy, chloroplasts immediately come to mind, and rightly so. Chloroplasts are the sites of photosynthesis, the process unique to plants (and some algae and bacteria) where light energy is captured and converted into chemical energy, primarily in the form of glucose and other organic compounds. This is where the plant literally “makes its food” from sunlight, water, and carbon dioxide. The equation for photosynthesis is: 6CO₂ (Carbon Dioxide) + 6H₂O (Water) + Light Energy → C₆H₁₂O₆ (Glucose) + 6O₂ (Oxygen). Notice how this is essentially the reverse of cellular respiration. Chloroplasts are typically abundant in the green parts of the plant, especially the leaves, where they can efficiently absorb sunlight. They represent the plant’s ability to be an autotroph – a self-feeder, producing its own organic sustenance. Mitochondria, on the other hand, are the cellular power plants that take the glucose (and other organic molecules) produced by chloroplasts and break them down through cellular respiration to release usable energy in the form of ATP. While chloroplasts are building up energy-rich molecules, mitochondria are breaking them down to fuel all cellular activities. This makes them two sides of the same metabolic coin, creating a dynamic energy cycle within the plant cell. Chloroplasts synthesize the fuel, and mitochondria burn it. This unique arrangement allows plants to be both producers and consumers of their own energy, making them the foundation of nearly all terrestrial ecosystems. This dynamic duo allows plants incredible flexibility. During the day, with ample sunlight, photosynthesis is highly active, producing a surplus of glucose and oxygen. Some of this glucose is immediately used by mitochondria for respiration, some is stored as starch for later, and the oxygen is released into the atmosphere. At night, or in parts of the plant that don’t receive light (like roots, stems, and flowers), photosynthesis ceases. However, the plant still needs energy for growth, maintenance, and repair. This is where mitochondria become even more critical, breaking down the stored glucose or other organic molecules to continuously supply ATP. This constant energy supply, day and night, is what enables plants to grow, flower, fruit, and survive even when light is unavailable. The efficient coordination between these two organelles is a testament to the sophisticated engineering within every single plant cell in your garden. For a deeper dive into the science behind this, you might find this resource on plant physiology insightful: https://ecorganicas.com/gardening/. Impact on Plant Health and Growth: Why Mitochondrial Efficiency Matters Understanding that plant cells have mitochondria and what they do is more than just biological trivia; it has profound implications for the health and growth of every plant in your Bengaluru garden. The efficiency of mitochondrial function directly correlates with the vigor, resilience, and productivity of your plants. Think of mitochondria as the internal combustion engines of your plant cells. If these engines are running smoothly, with clean fuel and optimal conditions, your plant will accelerate in growth, exhibit robust health, and deliver abundant yields. If they’re sputtering, choked by poor conditions, the plant will struggle. Consider growth and development. Every new leaf, every elongating stem, every budding flower, and every developing fruit requires a significant energy investment in the form of ATP. Cellular division, the process by which plants increase their size, is highly energy-intensive. If mitochondria are not producing enough ATP, cell division slows down, leading to stunted growth, smaller leaves, and overall diminished plant stature. This is particularly noticeable in fast-growing plants like many vegetables and annuals common in Bengaluru gardens. Flowering and fruiting are arguably the most energy-demanding processes in a plant’s life cycle. The formation of complex reproductive structures, the production of pollen and ovules, the attraction of pollinators, and the subsequent development of seeds and fruits all require a massive expenditure of ATP. A plant with inefficient mitochondria might produce fewer flowers, drop its blossoms prematurely, or yield small, poorly developed fruits. This can be particularly frustrating for home gardeners hoping for a bountiful harvest of mangoes, tomatoes, or chillies. Beyond visible growth, mitochondrial efficiency is critical for a plant’s stress response and resilience. Plants in Bengaluru face various environmental challenges: periods of intense heat, drought, heavy monsoon rains leading to waterlogged soil, and the constant threat of pests and diseases. When a plant encounters stress, it needs energy to activate defense mechanisms, repair damaged tissues, and adjust its metabolism. For instance, in response to drought, plants need energy to synthesize protective compounds and regulate stomatal opening. Against a pest attack, ATP is required to produce defensive chemicals. Plants with robust mitochondrial function are better equipped to withstand these stressors, recover more quickly, and maintain their productivity. This is why a healthy, energetic plant often appears more resistant to common garden problems. Furthermore, nutrient uptake and transport rely heavily on active transport mechanisms, which require ATP. Roots actively absorb essential minerals from the soil against a concentration gradient, a process powered by mitochondrial respiration. If root cells lack sufficient ATP, nutrient uptake becomes inefficient, leading to deficiencies even if nutrients are present in the soil. This can manifest as chlorosis (yellowing leaves) or other deficiency symptoms, directly impacting plant vitality. The health of your plant, from its deepest roots to its highest leaves, is intricately linked to the optimal performance of these microscopic powerhouses. For an in-depth scientific perspective, consider consulting resources like https://ecorganicas.com/. Supporting Mitochondrial Health in Your Garden Now that we understand the critical role mitochondria play in plant health, the natural next step for any keen gardener is to ask: how can I support optimal mitochondrial function in my plants? The good news is that many best gardening practices you already employ (or should consider) directly contribute to healthy cellular respiration and, consequently, robust mitochondrial activity. It all boils down to providing the ideal environment and resources that allow these tiny powerhouses to work at their peak. Optimal Soil Health: The Foundation of Energy Production The soil is where it all begins, especially for roots, which are entirely dependent on cellular respiration for energy. Mitochondria in root cells need a steady supply of oxygen. Aeration: Compacted or waterlogged soil starves roots of oxygen, leading to anaerobic conditions. This drastically reduces the efficiency of cellular respiration, impairing ATP production. Ensure your soil is well-aerated by incorporating plenty of organic matter, avoiding heavy foot traffic, and loosening compacted beds. For container plants, use a potting mix that drains well. Organic Matter: Rich compost and well-rotted manure improve soil structure, creating air pockets for oxygen. They also feed beneficial microorganisms, which in turn help break down organic matter and make nutrients available to plants. A healthy soil microbiome is vital for a healthy plant. Learn more about creating nutrient-rich soil in our article on https://ecorganicas.org/tag/aloe-vera-plant-stekken/. Balanced Nutrition: Fueling the Engines While glucose is the primary fuel, mitochondria require various nutrients to function efficiently, acting as cofactors for the enzymes involved in cellular respiration. Phosphorus (P): This element is a cornerstone of ATP itself (adenosine triphosphate). Adequate phosphorus levels are crucial for energy transfer. Magnesium (Mg): Magnesium is a vital component of chlorophyll (essential for photosynthesis, thus glucose production) and acts as a cofactor for many enzymes involved in respiration and energy metabolism. Trace Minerals: Iron, copper, zinc, and manganese are all essential for various enzymatic reactions within the mitochondria and chloroplasts. A balanced fertilizer regimen ensures your plants receive all necessary macronutrients and micronutrients. Over-fertilizing, especially with nitrogen, can lead to excessive leafy growth at the expense of root development and flowering, potentially diverting energy resources. Always follow recommended dosages. For more insights into plant nutrition, check out our guide on https://ecorganicas.org/pill-bugs-in-garden/. Judicious Watering: The Delicate Balance Water is essential for nutrient transport and numerous biochemical reactions. However, too much water is detrimental. Overwatering leads to waterlogged soil, displacing air and depriving roots of oxygen. This suffocates the root cells, severely hampering mitochondrial respiration and can lead to root rot. On the other hand, underwatering causes drought stress, reducing metabolic activity across the board. The key is consistent, deep, and infrequent watering that allows the soil to dry out slightly between waterings, ensuring both moisture and aeration. This is especially important during Bengaluru’s dry spells. Adequate Light: The Source of the Fuel While mitochondria don’t directly use light, chloroplasts do. And chloroplasts produce the glucose that mitochondria then use. Therefore, providing your plants with the appropriate amount of light for their species ensures they can photosynthesize efficiently, producing ample glucose to fuel their mitochondria. Without sufficient light, glucose production drops, leading to an energy deficit for the entire plant. Temperature Control: Optimizing Enzyme Activity Mitochondrial enzymes, like all enzymes, have optimal temperature ranges for activity. Extreme heat (common in Bengaluru summers) or cold can denature these enzymes or slow down their activity, reducing the efficiency of cellular respiration. Protecting plants from extreme temperatures through mulching, shading, or strategic planting can help maintain optimal metabolic rates. By focusing on these practical aspects, you’re not just superficially tending to your plants; you’re supporting the fundamental cellular processes that dictate their very life and vigor. For more on how soil health impacts overall plant function, refer to authoritative sources like https://ecorganicas.com/gardening-quiz-challenge/. Comparison of Gardening Techniques for Plant Energy & Health To help you make…
 - when to plant garlic
 when to plant garlic When to Plant Garlic Garlic, or lahsun as it’s known in India, is more than just a culinary staple; it’s a pungent powerhouse of flavour and an ancient remedy revered across cultures for its incredible health benefits. For any Indian home cook, especially here in Bengaluru, garlic is indispensable. Imagine the rich aroma of a piping hot sambar, the fiery kick in a spicy chutney, or the depth it adds to a comforting dal – none would be quite the same without the humble garlic clove. But beyond its undeniable presence in our kitchens, growing your own garlic offers a profound sense of satisfaction and a connection to the earth that few other vegetables can provide. There’s a particular magic in taking a single clove, planting it with care, and watching it transform over months into a bulb bursting with flavour, far superior to anything you might find in a supermarket. Homegrown garlic often boasts a more intense flavour, a sweeter aftertaste, and a firmer texture, qualities that truly elevate your cooking. Moreover, cultivating your own garlic ensures you’re getting a product free from pesticides and harmful chemicals, a crucial consideration for health-conscious gardeners. The therapeutic act of gardening itself, from preparing the soil to nurturing the plants, offers immense mental and physical well-being. It’s a rewarding journey that culminates in a bountiful harvest, providing you with fresh, organic garlic for months. Many gardeners are initially intimidated by the prospect of growing garlic, perhaps due to its long growing season or specific environmental requirements. However, with the right knowledge and a little planning, garlic is surprisingly forgiving and incredibly rewarding. The most critical factor for success, and often the most misunderstood, is when to plant garlic. Timing, as they say, is everything, and with garlic, planting at the optimal moment sets the stage for robust growth, large, healthy bulbs, and a successful harvest. This comprehensive guide is designed to demystify the planting process, specifically tailored for the unique climate and gardening conditions of Bengaluru, ensuring your garlic patch thrives. The Golden Window: Understanding Garlic’s Planting Season in Bengaluru For gardeners in Bengaluru, understanding the optimal planting window for garlic is paramount to a successful harvest. Unlike temperate regions where a hard frost is the primary signal for planting, our tropical savanna climate demands a different approach. The key here isn’t necessarily frost, but rather the cooler, drier period that follows our monsoon season, allowing the cloves to establish a strong root system before the warmer months. The ideal time to plant garlic in Bengaluru generally falls between late September to early November. This period capitalizes on the residual moisture from the retreating monsoon, combined with gradually cooling soil temperatures. Garlic requires a period of “vernalization” – exposure to cold temperatures – to initiate bulb formation. While Bengaluru doesn’t experience freezing winters, the cooler nights and moderate daytime temperatures during these months provide sufficient chill for most garlic varieties to perform well. Planting too early, when temperatures are still high, can lead to premature sprouting and a lack of proper root development, making the plant vulnerable to heat stress later on. Planting too late might mean the plants don’t get enough cool weather to properly vernalize, resulting in smaller, underdeveloped bulbs. By planting in this golden window, you allow the cloves to develop a robust root system throughout the cooler months, which is crucial for nutrient uptake and overall plant health. As the days begin to lengthen and warm up towards February and March, the plants shift their energy from leaf production to bulb formation, ultimately leading to a fantastic harvest around April or May. This strategic timing ensures that your garlic plants experience the necessary environmental cues at each stage of their growth cycle, maximizing their potential for large, flavourful bulbs. Remember, successful garlic cultivation in Bengaluru is about synchronizing with nature’s rhythm, not fighting against it. Hardneck vs. Softneck Varieties for Bengaluru The choice between hardneck and softneck garlic varieties significantly influences planting strategy and success in Bengaluru. Hardneck garlic is known for its strong, woody central stalk (the “hard neck”) and typically produces fewer, larger cloves arranged in a single ring around this stalk. It also sends up an edible flower stalk called a “scape,” which can be harvested and used in cooking. Hardnecks generally prefer colder winters for optimal vernalization, making them a bit more challenging in Bengaluru’s milder climate. However, some varieties can still perform well if planted early enough to catch the coolest part of our winter. Their rich, complex flavours are highly prized. Softneck garlic, conversely, has a pliable, “soft neck” that makes it ideal for braiding. It produces more cloves per bulb, often in multiple layers, and generally stores much longer than hardneck varieties. Softnecks are also more tolerant of warmer climates and do not strictly require a hard vernalization period, making them an excellent choice for Bengaluru gardeners. They tend to mature faster and are more adaptable to fluctuating temperatures. For beginners in Bengaluru, starting with softneck varieties like ‘California Early’ or ‘Inchelium Red’ is often recommended due to their adaptability and consistent performance. However, adventurous gardeners might experiment with specific hardneck varieties that have shown resilience in similar climates, ensuring they are planted at the earliest possible time within the golden window to maximize their exposure to cooler temperatures. Understanding these differences is key to selecting the right garlic type for your garden and ensuring a bountiful harvest. For more details on choosing the right variety, check out our guide on https://ecorganicas.org/privacy-policy/. Soil Preparation: The Unsung Hero Before any clove touches the soil, proper bed preparation is absolutely non-negotiable for garlic success, especially in Bengaluru’s often compacted and clayey soils. Garlic thrives in loose, well-draining soil rich in organic matter. Begin by selecting a site that receives at least 6-8 hours of direct sunlight daily. Next, prepare your soil by digging it over to a depth of at least 10-12 inches. Incorporate a generous amount of well-rotted compost or aged cow manure. This not only improves soil structure, enhancing drainage and aeration, but also provides a slow-release source of nutrients that garlic plants will appreciate throughout their long growing season. Aim for a soil pH between 6.0 and 7.0; a soil test can confirm this, and amendments like lime (to raise pH) or elemental sulfur (to lower pH) can be added if necessary. In Bengaluru, where heavy monsoon rains can lead to waterlogging, creating raised beds is an excellent strategy. Raised beds improve drainage significantly, prevent compaction, and allow the soil to warm up faster in spring, which is beneficial for bulb development. Ensure your raised beds are at least 8-10 inches high. A well-prepared soil bed provides the perfect foundation for your garlic cloves to root deeply, access essential nutrients, and develop into large, healthy bulbs. Neglecting soil preparation is a common mistake that can severely limit your yield, so invest the time and effort upfront for a truly rewarding harvest. We have a detailed article on https://ecorganicas.org/pill-bugs-in-garden/ that might be helpful. 🔥 Our Trending Gardening Pickshow deep to plant potatoesdo plant cells have mitochondriawhen to plant garlicwhat to plant with tomatoeswhat plants like coffee grounds Hardneck vs. Softneck: Choosing the Right Garlic for Your Garden The world of garlic is broadly divided into two main categories: hardneck and softneck. Understanding the distinctions between these two types is fundamental for any gardener, particularly when deciding what to plant in Bengaluru’s unique climate. Hardneck garlic, as its name suggests, develops a rigid, woody central stem that extends from the root plate through the bulb and up to the foliage. This characteristic makes it less suitable for braiding but signals its close genetic ties to wild garlic. Hardnecks are renowned for their more complex, often spicier flavour profiles, which vary significantly between varieties. They typically produce fewer but larger cloves, arranged in a single circle around the central stem. A unique feature of hardnecks is their production of “scapes” – the tender, curly flower stalks that emerge in late spring. These scapes are not only edible and delicious but harvesting them encourages the plant to put more energy into bulb development rather than seed production. Hardnecks generally require a colder vernalization period to trigger bulb formation, making them traditionally better suited for regions with harsh winters. However, certain varieties can still thrive in milder climates like Bengaluru if planted at the right time. Storage life for hardnecks is usually shorter, typically 4-6 months, compared to softnecks. On the other hand, softneck garlic varieties are characterized by their lack of a hard central stalk, allowing their necks to remain pliable even after curing. This flexibility makes them the ideal choice for braiding, a traditional method of storing garlic. Softnecks produce a greater number of cloves per bulb, often in multiple layers, and these cloves tend to be smaller and more uniformly shaped than hardneck varieties. Their flavour is generally milder, though still robust and distinctly garlicky. Crucially for Bengaluru gardeners, softnecks are more adaptable to warmer climates and do not strictly require a prolonged period of cold vernalization to form bulbs. This makes them a more reliable choice for consistent yields in our region. Softneck garlic also boasts a superior storage life, often lasting 6-12 months or even longer under proper conditions. When making your choice, consider your culinary preferences, storage needs, and most importantly, the specific microclimate of your garden. While hardnecks offer unique flavours and the delight of scapes, softnecks often provide a more dependable and prolific harvest for Bengaluru’s growing conditions. It’s always an adventure to try both and see which thrives best in your particular patch! Popular Hardneck Varieties in India While hardneck garlic generally prefers colder climates, a few varieties have shown promising results in areas with milder winters, and adventurous Bengaluru gardeners might find success with them. Varieties like ‘Rocambole’ types, known for their easy-to-peel cloves and rich flavour, or certain ‘Porcelain’ varieties, which produce exceptionally large cloves with a strong, hot taste, could be experimented with. The key to growing hardnecks successfully in Bengaluru is to plant them early in the golden window (late September/early October) to maximize their exposure to the coolest part of our winter. This helps ensure adequate vernalization. Gardeners should also focus on varieties known for their adaptability. It’s important to note that even with careful timing, hardneck yields in Bengaluru might be slightly less predictable than softnecks, but the unique culinary experience they offer, including the highly prized scapes, can be well worth the effort. Researching specific cultivars that have performed well in similar subtropical regions can provide valuable insights. Look for feedback from other Indian gardeners who have experimented with hardneck types to gauge their suitability for your local conditions. For a deeper dive into specific varieties and their characteristics, https://ecorganicas.com/gardening-quiz-challenge/ is an excellent resource. Popular Softneck Varieties for Warmer Climates For Bengaluru gardeners, softneck garlic varieties are generally the most reliable and recommended choice due to their adaptability to warmer climates and less stringent vernalization requirements. ‘California Early’ and ‘California Late’ are two widely available and popular softneck varieties known for their robust growth and good storage capabilities. ‘California Early’ matures faster, offering an earlier harvest, while ‘California Late’ provides a slightly later crop. Both produce good-sized bulbs with a satisfying garlicky flavour. Another excellent choice is ‘Inchelium Red’, an artichoke softneck variety known for its large bulbs, good keeping qualities, and mild but flavourful taste. ‘Silverskin’ varieties, generally recognized for their long storage potential and excellent braiding qualities, also perform well in warmer climates. When sourcing softneck garlic for planting, always look for certified disease-free bulbs from reputable suppliers, as planting quality cloves is paramount to avoiding disease and ensuring a healthy crop. These softneck varieties offer a consistent and rewarding experience for Bengaluru gardeners, providing ample homegrown garlic for all your culinary adventures without the intense cold requirements of their hardneck counterparts. Their resilience and abundant yields make them a go-to for many in subtropical regions. Beyond the Calendar: Environmental Cues and Microclimates While a general planting window is helpful, truly mastering garlic cultivation in Bengaluru involves looking beyond calendar dates and paying close attention to environmental cues and the specific microclimate of your garden. Bengaluru’s climate, while broadly categorized as tropical savanna, exhibits significant variations even within the city. Factors like proximity to large green spaces, elevation, concrete density, and even the shade cast by neighbouring buildings can create distinct microclimates, affecting soil temperature and moisture retention. The most critical environmental cue for garlic is soil temperature. Garlic cloves prefer to root in soil that is cool but not frozen, ideally between 10°C and 15°C (50°F-59°F). While air temperatures might fluctuate, soil temperatures remain more stable and are a better indicator of when to plant. You can use a soil thermometer to monitor this. If the soil is too warm, cloves may sprout too quickly, putting out foliage before developing a robust root system, which can lead to smaller bulbs later. If the soil is too cold, rooting will be delayed, impacting overall growth. Observing the natural world around you can also provide clues. When deciduous trees start shedding their leaves (if you have any), or when the intensity of the monsoon rains has significantly reduced, these are often signs that soil temperatures are beginning to drop to an ideal range. Furthermore, understanding the local weather patterns – not just the average, but the specific year’s monsoon intensity and duration – is vital. A prolonged monsoon might mean delaying planting slightly to avoid waterlogged conditions, while an early withdrawal could indicate an earlier planting opportunity. Bengaluru’s urban environment also presents unique challenges and opportunities. Concrete surfaces retain heat, creating warmer pockets, while shaded areas might remain cooler for longer. Adapting your planting time by a week or two, based on these observations, can make a significant difference to your garlic crop’s success. This approach, rooted in observation and responsiveness to nature, transforms gardening from a rigid schedule to a dynamic partnership with your environment, ensuring your garlic thrives in its unique setting. The Role of Soil Temperature Soil temperature is arguably the single most important environmental factor in determining the success of your garlic planting. For optimal root development and subsequent bulb formation, garlic cloves need to experience a period of cool soil. In Bengaluru, this typically means waiting until the peak monsoon rains have subsided and the soil has had a chance to cool down. Ideal soil temperatures for planting garlic cloves range from 10°C to 15°C (50°F to 59°F). At these temperatures, the cloves are encouraged to send out strong roots without immediately pushing up significant foliage. A robust root system is crucial for anchoring the plant, absorbing water, and taking up nutrients throughout its long growing cycle. If the soil is too warm at planting, cloves might sprout prematurely, developing weak foliage at the expense of root growth. This can make the plants more susceptible to heat stress and lead to smaller bulbs. Conversely, if the soil is too cold, rooting can be delayed, and growth will be stunted. Investing in a simple soil thermometer can take the guesswork out of planting and help you pinpoint the perfect moment to put your garlic in the ground, ensuring they get the best possible start for a healthy and productive season. This precision in timing, guided by soil temperature, is a hallmark of experienced garlic growers. For more advanced gardening techniques, consider exploring resources like https://ecorganicas.com/gardening/ which offers detailed information on soil science. Adapting to Bengaluru’s Urban Microclimates Bengaluru, a bustling metropolitan city, is characterized by diverse microclimates that can significantly impact gardening decisions. A garden in a shaded apartment balcony will have different temperature and light conditions than a sprawling backyard in a more suburban area. Urban heat islands, created by extensive concrete and buildings, can mean that soil temperatures remain higher for longer in certain localities compared to cooler, greener areas. When planting garlic, consider the specific conditions of your plot. If your garden is prone to waterlogging due to heavy clay soil and poor drainage, you might need to delay planting slightly after heavy rains to prevent the cloves from rotting. Conversely, if your garden is in a drier, more exposed spot, you might be able to plant a little earlier. Observe how sunlight hits your garden throughout the day and how long moisture persists in the soil. Raised beds are particularly beneficial in Bengaluru’s urban settings, offering improved drainage and allowing you to control soil composition more effectively. Container gardening is also a viable option for those with limited space, providing even greater control over the microclimate. By understanding and adapting to the unique conditions of your Bengaluru microclimate, you can fine-tune your planting schedule and cultivation practices to ensure your garlic thrives, regardless of the broader city-wide climate. This personalized approach is what distinguishes successful urban gardeners. For more on urban gardening in Bengaluru, check out https://ecorganicas.org/tag/aloe-vera-plant-stekken/. Preparing Your Garden Bed for Optimal Garlic Growth The foundation of a successful garlic harvest lies in meticulous garden bed preparation. Garlic is a heavy feeder and has a long growing season, demanding nutrient-rich, well-draining soil from the outset. Neglecting this crucial step can lead to stunted growth, smaller bulbs, and increased susceptibility to diseases. In Bengaluru, where soils can often be compacted or clay-heavy, special attention to soil amendment and structure is paramount. Start by choosing a sunny location that receives at least 6-8 hours of direct sunlight daily. Garlic will tolerate partial shade, but full sun encourages the largest bulbs. Once you’ve identified your spot, clear the area of any weeds, rocks, or debris. Digging or tilling the soil to a depth of at least 10-12 inches is essential. This breaks up compaction, allowing garlic roots to penetrate deeply and access nutrients and moisture efficiently. This deep cultivation is particularly important because garlic roots can extend surprisingly far, and unrestricted growth leads to larger, healthier bulbs. After…
 - what to plant with tomatoes
 what to plant with tomatoes What to Plant with Tomatoes Greetings, fellow green thumbs and urban gardeners of Bengaluru! There’s a special kind of magic that unfolds when you pluck a sun-warmed, juicy tomato straight from your own vine. The taste, the aroma, the sheer satisfaction – it’s unparalleled. Tomatoes, with their vibrant colours and versatile uses, are undeniably the superstars of many home gardens, gracing everything from our tangy rasams to fresh salads. But imagine if you could make your tomato plants even happier, healthier, and more productive, all while fending off pesky intruders naturally and enhancing their flavour profile. Sounds like a dream, doesn’t it? Well, that dream is precisely what companion planting offers, transforming your garden into a thriving ecosystem where every plant plays a vital role. This isn’t just about sticking a few plants together; it’s an age-old, sustainable gardening practice that leverages the natural synergies between different species. For us in Bengaluru, where space can be a premium and the climate presents unique challenges – from the intense summer sun to the sometimes-unpredictable monsoon showers – companion planting is an invaluable technique. It’s about creating a biodiverse environment that naturally deters pests, attracts beneficial insects like pollinators and predators, improves soil health, and even boosts the flavour of your prized tomatoes. By carefully selecting plants that complement each other, you can reduce the need for chemical interventions, make the most of every square inch of your garden or balcony space, and cultivate a more resilient and vibrant patch of green. Think of it as building a supportive community for your tomatoes, a bustling neighbourhood where everyone contributes to the collective well-being. This detailed guide will delve deep into the art and science of companion planting for tomatoes, offering practical advice tailored for our local conditions, ensuring your tomato harvest is not just abundant, but truly exceptional. Let’s unlock the secrets to a harmonious and prolific tomato patch right here in the garden city! The Pest Patrol: Natural Defenders for Your Tomatoes One of the most compelling reasons to embrace companion planting is its ability to act as a natural pest deterrent. Instead of reaching for chemical sprays, which can harm beneficial insects and the environment, you can strategically place plants that naturally repel common tomato pests. This creates a protective barrier, keeping your tomato plants safe and healthy. For Bengaluru gardeners, dealing with pests like aphids, whiteflies, and fruit borers is a common challenge, making natural solutions particularly appealing. Marigolds: The Garden’s Golden Shield When it comes to pest control, marigolds (specifically French and African varieties) are often hailed as the garden’s best friend. These cheerful, vibrant flowers do more than just add a splash of colour; their roots release thiophenes, compounds known to repel harmful nematodes in the soil, which can severely damage tomato roots. Their strong, pungent scent also confuses and deters other flying pests like whiteflies and hornworms. Planting marigolds densely around the base of your tomato plants or along the garden borders can create an effective living barrier. In Bengaluru’s sunny climate, marigolds thrive, making them an excellent choice for a low-maintenance, high-impact companion. They are robust, require minimal care, and their continuous blooming adds beauty throughout the growing season. Just remember to deadhead them regularly to encourage more flowers and stronger pest-repelling action. Basil: Aromatic Protector and Flavor Enhancer Beyond its culinary delights, basil is an outstanding companion for tomatoes. Its strong, aromatic scent is believed to repel flies, mosquitoes, and even tomato hornworms. Many gardeners also swear that planting basil nearby significantly enhances the flavour of their tomatoes, making them sweeter and more succulent. While scientific evidence for flavour enhancement is anecdotal, the pest-repelling qualities are well-documented. Plant basil directly between your tomato plants or in nearby containers. The partial shade provided by the taller tomato plants can also help protect basil from the harshest Bengaluru sun, allowing it to flourish. Regular harvesting of basil leaves will keep the plant bushy and aromatic, providing a continuous supply for your kitchen and a constant protective scent for your tomatoes. This partnership is a classic for a reason, offering dual benefits for both your garden and your plate. Borage: The Benevolent Blue Flower With its striking blue, star-shaped flowers, borage is not just a beautiful addition to your garden; it’s a powerhouse for attracting beneficial insects. Borage is a magnet for pollinators like bees, which are essential for fruit set in tomatoes, and also attracts predatory wasps. These wasps are natural enemies of destructive pests like tomato hornworms and cabbage worms, helping to keep your tomato plants safe. Borage is also known as a dynamic accumulator, meaning its deep taproots draw up nutrients from the soil, making them available to shallower-rooted plants like tomatoes when its leaves decompose. Some gardeners even believe it improves tomato flavour and disease resistance. Plant borage a little further away from your tomato plants, as it can grow quite large, but close enough for its benefits to be felt. It’s particularly resilient and self-seeds readily, ensuring a continuous presence in your garden. Neem: The Indigenous Powerhouse While not a companion plant in the traditional sense of direct interplanting, Neem (Azadirachta indica) is an indispensable ally for any organic gardener in India, especially in Bengaluru. Its leaves and seeds are processed to create powerful organic pesticides and fungicides. Incorporating neem cake into the soil around your tomato plants can help deter nematodes and other soil-borne pests. Spraying dilute neem oil solutions on your tomato plants can repel a wide array of pests, including aphids, whiteflies, and spider mites, without harming beneficial insects. It acts as an antifeedant and growth disruptor for pests, making it a sustainable and effective part of an integrated pest management strategy. A mature neem tree nearby can offer shade, but its primary benefit to tomatoes comes from its extracted products. This traditional Indian resource is a must-have in your organic gardening arsenal, supporting your companion planting efforts by providing an extra layer of protection. For more organic pest control methods, check out https://ecorganicas.org/tag/aloe-vera-plant-stekken/. Flavor Enhancers and Growth Promoters: A Symphony of Taste and Vigor Beyond pest control, certain companion plants can actually boost the growth of your tomatoes or, even more excitingly, enhance their flavour. This symbiotic relationship goes beyond simple protection, creating a truly harmonious environment where both plants thrive and yield superior results. Imagine biting into a tomato that’s not just homegrown, but tastes *better* because of its neighbours! Carrots: Deep-Rooted Partners Carrots, with their long, slender taproots, can be surprisingly beneficial companions for tomatoes. As carrot roots grow deeper into the soil, they help to loosen and aerate it. This improved soil structure makes it easier for the shallower, fibrous roots of tomato plants to spread and access water and nutrients. Furthermore, the foliage of carrot plants provides a living mulch, helping to suppress weeds and retain soil moisture around the tomato base. Just ensure you plant them early enough so they don’t get completely shaded out by the mature tomato plants. The slightly acidic soil tomatoes prefer also suits carrots, creating a mutually beneficial growing environment. When planning your garden layout in Bengaluru, consider rows of carrots running parallel to your tomato rows for optimal effect. Parsley: Aromatic Groundcover Parsley is another excellent choice for interplanting with tomatoes. Like basil, its aromatic foliage is believed to deter some pests. More importantly, parsley, particularly flat-leaf varieties, forms a low-growing groundcover that helps to keep the soil cool and moist, reducing the need for frequent watering – a definite plus during Bengaluru’s drier spells. Its flowers, when allowed to bloom, attract beneficial insects like hoverflies and predatory wasps, which prey on aphids and other small pests. Parsley is relatively low-maintenance and can tolerate the partial shade cast by taller tomato plants, making it a versatile companion. The rich organic matter that parsley adds to the soil as it grows and eventually decomposes also contributes to overall soil health, providing a gentle, continuous nutrient boost. Mint: Proceed with Caution! While mint is often lauded for its pest-repelling properties – its strong scent can deter slugs, aphids, and even rodents – it comes with a significant caveat: its incredibly invasive nature. If planted directly in the garden bed, mint will quickly take over, outcompeting your tomatoes for nutrients and space. However, this doesn’t mean you can’t harness its benefits. The solution for Bengaluru gardeners with limited space is simple: plant mint in containers and place these pots strategically near your tomato plants. This way, you get the pest-repelling aroma without the aggressive root system disrupting your main crop. Different mint varieties, like spearmint or peppermint, offer slightly different aromatic profiles, but all serve the purpose. Just ensure the containers are large enough for the mint to thrive and keep an eye on its growth. Chives and Onions: The Sulfur Squad Members of the allium family, such as chives, onions, and garlic, are fantastic companions for tomatoes. These plants release sulfur compounds into the soil and air, which are known to repel a wide range of pests, including aphids, spider mites, and Japanese beetles. Chives, in particular, are small enough to be interplanted directly at the base of tomato plants without competing for resources. They also help to improve the overall health and vigour of the tomato plant, potentially by enhancing disease resistance. Some gardeners also claim that alliums can improve the flavour of tomatoes. For Bengaluru’s humid conditions, where fungal diseases can sometimes be an issue, the mild fungicidal properties attributed to alliums can be an added bonus. They are easy to grow and can be continuously harvested, providing fresh ingredients for your kitchen while protecting your tomatoes. Nitrogen Fixers and Soil Improvers: Feeding Your Tomatoes from the Ground Up Tomatoes are heavy feeders, meaning they require a substantial amount of nutrients, particularly nitrogen, to produce abundant fruit. Instead of relying solely on external fertilizers, you can enlist the help of companion plants that naturally enrich your soil, creating a self-sustaining nutrient cycle. This approach is not only environmentally friendly but also builds long-term soil health, a cornerstone of successful organic gardening in Bengaluru. Legumes (Beans, Peas): The Nitrogen Powerhouses Legumes like bush beans and peas are renowned for their incredible ability to fix atmospheric nitrogen into the soil through a symbiotic relationship with rhizobia bacteria in their root nodules. Nitrogen is crucial for leafy growth and overall plant vigour, which directly translates to a healthier, more productive tomato plant. When the legume plants are done producing, or even as their roots naturally die off, this fixed nitrogen becomes available to other plants in the vicinity. For tomatoes, this means a steady, natural supply of one of their most important nutrients. It’s important to choose bush varieties of beans or peas rather than pole varieties, as pole types can grow too tall and shade out your tomatoes, competing for light. Planting bush beans between tomato plants or in alternating rows can be highly effective. They also provide groundcover, helping to suppress weeds and maintain soil moisture, which is especially beneficial during Bengaluru’s dry spells. Comfrey: Dynamic Accumulator for Nutrient Cycling Comfrey is often referred to as a “dynamic accumulator” because its deep taproots can mine nutrients from deep within the soil, bringing them up to its leaves. These leaves are incredibly rich in potassium, calcium, and other trace minerals. While not directly planted *with* tomatoes in the same bed due to its size, planting comfrey nearby and then using its leaves as a “chop and drop” mulch around your tomato plants is an excellent strategy. Simply harvest the large comfrey leaves, chop them up, and lay them around the base of your tomatoes. As they decompose, they release a slow, steady supply of these vital nutrients directly to your tomato plants. This method significantly enriches the soil, improves its structure, and provides a natural, organic fertilizer boost. Comfrey also attracts pollinators and beneficial insects, adding another layer of ecological benefit to your garden. Nasturtiums: Trap Cropping and Beauty Nasturtiums are wonderful multi-purpose companion plants. Their vibrant, edible flowers and peppery leaves are a treat for salads, but their primary benefit for tomatoes lies in their ability to act as a trap crop. Aphids are highly attracted to nasturtiums, often preferring them over tomato plants. By planting nasturtiums nearby, you can lure aphids away from your precious tomatoes, concentrating them on the nasturtiums where they can be easily managed or simply left to be consumed by beneficial predators. This technique effectively protects your main crop. Additionally, nasturtiums offer excellent groundcover, suppressing weeds and conserving soil moisture. Their trailing habit can also create a beautiful, colourful display at the base of your tomato plants. They are easy to grow and thrive in Bengaluru’s climate, making them a practical and aesthetically pleasing choice for your companion planting scheme. Shade and Support: Protecting Your Tomatoes from the Bengaluru Sun Bengaluru’s climate can be intense, especially during the hotter months. While tomatoes love sun, prolonged exposure to scorching heat can lead to sunscald on fruits and stressed plants. Thoughtful companion planting can provide natural shade and even some physical support, ensuring your tomatoes remain productive and healthy even under challenging conditions. Lettuce and Spinach: Cool Companions For gardeners in Bengaluru, maximizing space and extending harvest seasons are key. Lettuce and spinach are excellent cool-season crops that benefit immensely from the partial shade provided by taller tomato plants. Planted at the base of your tomatoes, they receive just enough filtered sunlight to thrive without bolting (going to seed) prematurely due to intense heat. This allows you to extend your harvest of these leafy greens well into the warmer months, making the most of your garden beds. Their broad leaves also act as a living mulch, helping to keep the soil cool and moist around the tomato roots, which is crucial for reducing water stress for both plants. This synergistic relationship means you get two crops from the same footprint, a highly efficient use of space, especially in urban gardens. Peppers: Cousins in the Sun Peppers, both sweet and hot, belong to the same botanical family (Solanaceae) as tomatoes, meaning they generally have similar growing requirements for sunlight, water, and nutrients. This commonality can make them suitable companions. Planting them near each other can create a microclimate that benefits both. The slightly taller tomato plants can offer a touch of filtered shade to the peppers during the harshest part of the day, preventing sunscald on pepper fruits. Conversely, the dense foliage of the pepper plants can help maintain soil moisture around the tomato roots. While they are both heavy feeders, careful soil preparation with plenty of compost and balanced organic fertilization can ensure both plants have adequate nutrients. This pairing works well in Bengaluru, provided you manage their nutrient needs and ensure good air circulation to prevent fungal issues, a common concern in humid conditions. Sunflowers: Tall Sentinels (with a caveat) Sunflowers can be majestic companions, offering dramatic height and beauty to your garden. Their primary benefit for tomatoes is the shade they can provide, protecting delicate tomato fruits and foliage from the harsh midday sun, which is particularly useful in Bengaluru’s scorching summers. They can act as natural stakes, offering a sturdy structure for indeterminate tomato varieties to lean on. However, sunflowers are incredibly heavy feeders and have extensive root systems. If planted too close, they can outcompete tomatoes for nutrients and water, potentially stunting tomato growth. The key is strategic placement: plant sunflowers on the north side of your tomato patch (in the Northern Hemisphere, which includes India) to ensure they cast beneficial afternoon shade without blocking morning sun. Ensure ample spacing and rich soil to accommodate both plants’ needs. With careful planning, sunflowers can be a striking and functional addition to your tomato garden. For more tips on maximizing your small garden space, see https://ecorganicas.org/category/organic/. What NOT to Plant with Tomatoes: Avoiding Garden Disasters Just as some plants are fantastic allies, others can be detrimental, hindering growth, attracting pests, or even releasing toxic compounds. Knowing which plants to avoid is just as crucial as knowing which ones to plant. Avoiding these “bad neighbours” can save you a lot of heartache and ensure your tomatoes thrive. Brassicas (Cabbage, Broccoli, Cauliflower): Nutrient Competitors The entire Brassica family, which includes common vegetables like cabbage, broccoli, cauliflower, kale, and mustard greens, should generally be kept away from tomatoes. Both tomatoes and brassicas are heavy feeders, meaning they require a substantial amount of nutrients from the soil. When planted together, they intensely compete for these vital resources, leading to stunted growth and reduced yields for both. Furthermore, brassicas can attract specific pests like cabbage worms and flea beetles, which, while not primarily tomato pests, can sometimes migrate or contribute to an overall increase in pest pressure in the garden. Their differing soil pH preferences (brassicas often prefer slightly more alkaline soil) also make them incompatible. It’s best to give these two plant families their own distinct garden beds to ensure optimal growth for each. Corn: Shade and Pest Magnets While corn might seem like a good candidate for providing shade, it’s generally not a good companion for tomatoes. Firstly, corn grows significantly taller than most tomato varieties and can cast too much dense shade, depriving tomatoes of the sunlight they need to produce fruit. Secondly, corn and tomatoes share common pests, most notably the corn earworm (also known as the tomato fruitworm). Planting them together essentially creates a buffet for this destructive pest, allowing it to easily move from one crop to the other and cause widespread damage. Both are also heavy feeders, competing for nutrients. It’s far better to keep corn and tomatoes separated in different parts of your garden to minimize pest transfer and ensure both receive adequate light and resources. Fennel: The Growth Inhibitor Fennel is a beautiful herb with a distinct anise flavour, but it has a well-known reputation as a poor companion for almost all garden plants,…
 - what plants like coffee grounds
 what plants like coffee grounds What Plants Like Coffee Grounds Ah, the rich aroma of freshly brewed coffee – a delightful start to the day for millions across Bengaluru and beyond. But what if that invigorating brew offered more than just a morning pick-me-up? What if the very grounds left behind held a secret power, a hidden potential to transform your garden into a lush, vibrant paradise? In our constant quest for sustainable living and enriching our green spaces, we often overlook the incredible resources right in our own homes. Used coffee grounds are one such treasure, a humble byproduct with surprising benefits for your plants and soil. Far from being mere waste, these grounds are a veritable powerhouse of nutrients and organic matter, ready to breathe new life into your garden beds and potted wonders. For the ardent gardener in India’s Garden City, understanding how to best utilize every resource is key to cultivating a thriving ecosystem. Coffee grounds, with their unique composition, offer a compelling case for inclusion in your gardening routine. They are packed with essential plant nutrients like nitrogen, potassium, and phosphorus, along with a host of beneficial micronutrients such as magnesium, calcium, and copper. But their magic extends beyond just nutrient delivery. They significantly improve soil structure, enhancing drainage in heavy clay soils while boosting water retention in sandy soils – a crucial benefit given Bengaluru’s varied soil types and increasingly unpredictable weather patterns. Furthermore, their organic content acts as a slow-release fertilizer, gently nourishing your plants over time without the harsh chemical spikes associated with synthetic alternatives. This not only promotes healthier, more resilient growth but also fosters a bustling underground world of beneficial microbes and earthworms, the unsung heroes of any fertile garden. Imagine diverting your daily coffee waste from the landfill and instead using it to coax more blooms from your roses or greener foliage from your ferns. It’s a win-win for both your garden and the environment, embodying the true spirit of mindful, sustainable gardening. Let’s delve deeper into this fascinating world and uncover which plants truly sing when treated to a dose of your morning brew’s leftovers. The Acid-Loving Brigade: Plants That Thrive on Coffee Grounds While coffee grounds are often touted for their nitrogen content, their most famous attribute in the gardening world is their ability to add a touch of acidity to the soil. This makes them a natural fit for a specific group of plants that prefer a slightly lower pH level, a common challenge in many urban gardens where soil can lean towards alkaline. For Bengaluru gardeners, understanding this preference can unlock new levels of vibrancy in your chosen flora. Think of those stunning, deep blue hydrangeas, the robust health of a flourishing rose bush, or the lush foliage of a camellia – these are often the plants that truly appreciate the subtle acidity coffee grounds can provide. Roses: A Bengaluru Gardener’s Delight No garden in Bengaluru is complete without the timeless beauty of roses. These queens of the garden, cherished for their fragrant blooms and diverse colours, are known to appreciate a slightly acidic to neutral soil (pH 6.0-7.0). Used coffee grounds, with their mild acidity, can be particularly beneficial for roses, helping them absorb nutrients more efficiently from the soil. The nitrogen content promotes vigorous leafy growth, while the organic matter improves soil structure around their roots. When applying, gently work a thin layer of dried coffee grounds around the base of your rose bushes, ensuring not to pile them directly against the stem. This can lead to fantastic results, promoting stronger canes and more abundant, vibrant blooms that truly stand out in your garden. Remember, moderation is key; a light, consistent application is far more effective than an infrequent heavy one. 🔥 Our Trending Gardening Pickshow deep to plant potatoesdo plant cells have mitochondriawhen to plant garlicwhat to plant with tomatoeswhat plants like coffee grounds Vibrant Hydrangeas and Azaleas If you dream of those captivating blue hydrangeas, coffee grounds are your secret weapon. Hydrangeas are famously sensitive to soil pH, with acidic soil producing blue flowers and alkaline soil yielding pink ones. By incorporating coffee grounds, you can gently nudge the soil pH downwards, encouraging those coveted azure hues. Similarly, azaleas and rhododendrons, which are distant cousins in their preference for acidic soil, will flourish with the added organic matter and slight acidity from coffee grounds. These plants, with their stunning floral displays, will exhibit healthier foliage and more profuse blooming cycles. Other acid-loving plants that will benefit include camellias, gardenias, and specific types of ferns. Even some fruit-bearing plants like blueberries (though less common in Bengaluru gardens, good to know for those experimenting) and strawberries can enjoy a boost from carefully applied coffee grounds. For a deeper dive into soil health, check out our guide on https://ecorganicas.org/privacy-policy/. Beyond Acidity: How Coffee Grounds Enhance Soil Health for All While the pH-altering properties of coffee grounds are a significant draw for specific plants, their benefits extend far beyond just acidity. Used coffee grounds are a fantastic source of organic matter, and this simple fact makes them a valuable addition to almost any garden soil, irrespective of its current pH. Think of your soil as a living ecosystem; the more diverse and rich it is in organic matter, the more thriving and resilient your plants will be. This is where coffee grounds truly shine, offering a multitude of advantages that contribute to overall soil vitality and plant vigour. One of the most crucial benefits is the improvement of soil structure. In Bengaluru, we often encounter soils that are either too clayey, leading to poor drainage and compaction, or too sandy, resulting in rapid water loss and nutrient leaching. Coffee grounds, when incorporated into the soil, help to aggregate clay particles, making the soil more friable and improving aeration. For sandy soils, they act like tiny sponges, enhancing water retention and preventing nutrients from washing away too quickly. This balanced approach to soil structure is vital for healthy root development, allowing roots to breathe, access water, and absorb nutrients more efficiently. This structural improvement is a long-term investment in your garden’s health, making your plants more resilient to environmental stresses, including the varied monsoon and dry spells we experience. Furthermore, coffee grounds are a feast for the microbial world beneath our feet. They provide a rich carbon source for beneficial bacteria and fungi, which play an indispensable role in nutrient cycling and disease suppression. These microscopic allies break down organic matter, converting it into forms readily available for plant uptake. And let’s not forget the earthworms! These natural tillers are incredibly attracted to coffee grounds. As they burrow through the soil, they create channels that improve aeration and drainage, while their castings (worm poop) are a highly potent form of natural fertilizer. Attracting more earthworms to your garden is one of the easiest and most effective ways to build truly fertile and living soil. So, even if your plants don’t crave acidity, the general improvement in soil structure, nutrient availability, and microbial activity makes coffee grounds a worthy amendment for a wide array of garden inhabitants. To learn more about fostering a healthy soil ecosystem, read our article on https://ecorganicas.org/shop/. The Art of Application: Safely Using Coffee Grounds in Your Garden Knowing that coffee grounds are beneficial is one thing; knowing how to apply them correctly is another. While these spent grounds are a gardener’s friend, improper application can sometimes lead to unintended consequences. The key lies in moderation, preparation, and understanding the different ways they can be incorporated into your gardening routine. For the Bengaluru gardener, accustomed to managing various soil types and plant needs, mastering the art of coffee ground application can be a rewarding skill. Direct Application: Sprinkling and Mixing The simplest method is to sprinkle a thin layer of used and dried coffee grounds directly around the base of your plants. It’s crucial that the grounds are dry to prevent mold growth, which can occur if wet grounds are left in a thick, anaerobic layer. Once sprinkled, gently scratch them into the top inch or two of the soil. This helps integrate them, prevents them from forming a water-repelling crust, and allows beneficial microbes to get to work. Avoid piling fresh, wet grounds directly against plant stems, as this can trap moisture and encourage fungal issues or even nitrogen burn in sensitive plants. This method is excellent for established acid-loving plants like roses, hydrangeas, and camellias, providing a slow release of nitrogen and improving surface soil structure. For a quick guide on organic pest control, check out https://ecorganicas.org/pill-bugs-in-garden/. Composting: The Gold Standard Perhaps the safest and most effective way to utilize coffee grounds is by adding them to your compost pile. Coffee grounds are considered a “green” material in composting terms, rich in nitrogen, and a fantastic activator for your pile. They break down quickly, add valuable nutrients, and even help neutralize odors from other organic waste. Mixing them with “brown” materials like dried leaves, shredded newspaper, or straw creates a balanced compost that is ideal for all plants. Composting also helps to mitigate any potential acidity concerns, as the composting process tends to neutralize the pH, making the resulting compost suitable for a wider range of plants, including those that prefer neutral or slightly alkaline conditions. This is the recommended approach for gardeners who are unsure about their soil’s current pH or have a diverse collection of plants with varying needs. Coffee Ground “Tea” (Liquid Fertilizer) For a quick nutrient boost, especially for container plants or seedlings, you can make a “coffee ground tea.” Simply soak about a cup of used coffee grounds in a 5-gallon bucket of water for a few days, stirring occasionally. Strain the liquid and dilute it further until it looks like weak tea. This nutrient-rich liquid can then be used to water your plants, providing a gentle, readily available dose of nitrogen and other minerals. This method is particularly useful for plants that need a quick pick-me-up or for foliar feeding, though it should be used sparingly and in diluted form to avoid over-fertilization. Remember, consistency and observation are your best tools when incorporating any new amendment into your garden. Always start with smaller amounts and observe your plants’ reactions. Who Doesn’t Like Coffee? Plants to Keep Coffee Grounds Away From While the benefits of coffee grounds are extensive, it’s crucial to remember that not all plants are created equal, and some simply don’t appreciate the unique properties of spent coffee. Just as some people prefer tea over coffee, certain plants have distinct preferences for soil conditions that might be negatively impacted by the addition of coffee grounds. Understanding these preferences is vital to prevent accidental harm and ensure all your garden inhabitants thrive. For the discerning gardener in Bengaluru, this means knowing when to offer a coffee treat and when to politely decline on behalf of your plants. The primary reason some plants dislike coffee grounds stems from their preference for alkaline or neutral soil conditions. Coffee grounds, even used ones, tend to be mildly acidic, and while this is a boon for acid-loving plants, it can be detrimental to others. Plants that thrive in neutral to alkaline soils might struggle to absorb essential nutrients if the pH is lowered too much. Symptoms of pH imbalance can include nutrient deficiencies (even if nutrients are present in the soil, they become unavailable), stunted growth, and yellowing leaves. It’s always better to err on the side of caution with these varieties. Among the plants that generally prefer to stay away from coffee grounds are those that naturally thrive in neutral to slightly alkaline environments. This list includes popular herbs like Lavender and Rosemary, both of which are common in Bengaluru gardens for their fragrance and culinary uses. Their Mediterranean origins mean they prefer well-drained, often stony soils with a higher pH. Similarly, vegetables such as Asparagus and most legumes (beans, peas) also prefer neutral to slightly alkaline conditions for optimal growth and yield. While there’s some debate regarding tomatoes, many gardeners find that tomatoes perform best in slightly acidic to neutral soil, and a heavy application of coffee grounds might push them too far on the acidic scale, potentially affecting fruit production. It’s important to note that very fresh coffee grounds also contain compounds that can inhibit seed germination and seedling growth for some plants, so always opt for used and composted grounds when possible. Another factor to consider is the nitrogen content. While beneficial for leafy growth, excessive nitrogen can sometimes lead to an imbalance, promoting lush foliage at the expense of flowers or fruit. For plants where flowering or fruiting is the primary goal, over-application of nitrogen-rich coffee grounds could be counterproductive. Always observe your plants carefully for any signs of distress or unusual growth patterns after applying any new amendment. When in doubt, it’s always safer to use coffee grounds in your compost pile, where the composting process naturally neutralizes their acidity and distributes nutrients more evenly, making the resulting compost safe for virtually all plants. Understanding these nuances ensures that your coffee grounds become a beneficial tool, not a potential hazard, in your gardening journey. Brewing Up More Benefits: Creative & Sustainable Uses Beyond their direct application as a soil amendment, used coffee grounds hold a wealth of other potential uses that can further enhance your garden and promote sustainable living. Embracing these creative applications not only maximizes the utility of your daily coffee waste but also aligns perfectly with the ethos of a resourceful and eco-conscious gardener. For the innovative Bengaluru gardener, these tips offer exciting new ways to integrate coffee grounds into their green practices. Compost Accelerator and Vermicomposting Star As mentioned, coffee grounds are a fantastic “green” material for your compost pile, rich in nitrogen, which is essential for heating up the pile and speeding up decomposition. They can help balance out “brown” materials like dried leaves and cardboard. But their benefits extend even further, making them a favorite for vermicomposting. Earthworms absolutely adore coffee grounds! Adding them in moderation to your worm bin provides a nutritious food source and helps create a rich, dark vermicompost teeming with beneficial microbes. This worm casting-rich compost is one of the best soil amendments you can produce, improving everything from soil structure to nutrient availability. https://ecorganicas.com/gardening-quiz-challenge/ Natural Pest Deterrent and Critter Repellent The strong scent and coarse texture of coffee grounds can act as a natural deterrent for certain garden pests. Slugs and snails, which can be a nuisance in Bengaluru’s moist conditions, are often deterred by a barrier of coffee grounds around vulnerable plants. The abrasive texture makes it difficult for them to cross, and the caffeine might also have an adverse effect. Similarly, some anecdotal evidence suggests that sprinkling coffee grounds around garden beds can help deter cats from using them as a litter box, though results can vary. For ants, a sprinkle of grounds along their trails might disrupt their scent pathways, encouraging them to find new routes. While not a foolproof solution, it’s a non-toxic, eco-friendly first line of defense worth trying. Seed Starting Mix Component and Mushroom Cultivation When used sparingly and thoroughly mixed with other ingredients, a small amount of coffee grounds can be added to homemade seed starting mixes. They provide a gentle boost of nutrients and improve drainage. However, caution is advised as too much can inhibit germination due to acidity or potential mold. On a more advanced note, coffee grounds are an excellent substrate for growing certain types of mushrooms, such as oyster mushrooms. This fascinating application turns waste into a gourmet food source and further highlights the versatile nature of these humble grounds. Researching specific mushroom cultivation techniques can open up an entirely new dimension of gardening and food production right in your backyard. Odor Neutralizer and Cleaning Agent Outside of direct plant benefits, coffee grounds are excellent natural odor neutralizers. Place a small bowl in your fridge, compost bin, or even your garden shed to absorb unpleasant smells. Their slightly abrasive nature also makes them useful for cleaning stubborn grime off garden tools, pots, and even hands after a day in the dirt, all without harsh chemicals. This multi-faceted utility truly makes used coffee grounds a sustainable superhero in and around your home and garden. Comparison Table: Coffee Ground Application Methods Understanding the various ways to apply coffee grounds is crucial for maximizing their benefits in your garden. Here’s a comparison of common methods: Method/Product Benefits Best Use Case Considerations Directly Applied Coffee Grounds Slow-release nitrogen, improved soil texture, mild acidity. Acid-loving plants (Roses, Hydrangeas), surface soil improvement, pest deterrence. Use dried grounds; apply thinly; avoid piling against stems; can attract mold if wet and thick. Composted Coffee Grounds Neutral pH, rich in balanced nutrients, enhances overall soil structure, microbial activity. All plants (vegetables, flowers, shrubs), general soil amendment, raised beds. Requires a compost pile; takes time to break down; ensures even nutrient distribution. Coffee Ground “Tea” (Liquid Feed) Quick nutrient boost (nitrogen), easy absorption, gentle for seedlings. Potted plants, seedlings, plants needing a quick pick-me-up, foliar feeding. Must be diluted heavily; use sparingly to avoid over-fertilization; can be messy to prepare. Vermicompost with Coffee Grounds Superior soil amendment, rich in worm castings, highly active microbial life, excellent soil structure. High-value crops, container gardening, starting seeds, boosting soil fertility long-term. Requires a worm bin; careful balance of food scraps for worms; takes time for production. Balanced Organic Fertilizer Precise nutrient ratios, often includes a wider range of micronutrients, easy application. Specific nutrient deficiencies, ensuring balanced growth, supplementing coffee grounds. Can be more expensive; still requires careful application; less direct soil structure improvement than organic matter. Expert Tips for Using Coffee Grounds in Your Garden Always Use Used Grounds: Fresh coffee grounds are too acidic and contain compounds that can inhibit plant growth. Always use grounds that have been brewed. Dry Grounds Before Storage: Spread used grounds on a tray to air dry…
 - how to repot a plant
 how to repot a plant How to Repot a Plant Ah, the joy of watching your beloved houseplants thrive! From the vibrant Money Plant adorning a corner of your living room to the serene Peace Lily gracing your balcony, each green companion brings life and beauty to our homes. But just like any living being, our plants need a little extra care and attention to reach their full potential. One of the most fundamental yet often overlooked aspects of plant care is repotting. It’s not just about giving your plant a bigger home; it’s a vital ritual that ensures continued growth, robust health, and breathtaking vibrancy. Imagine a growing child wearing shoes that are too small – uncomfortable, restrictive, and hindering their development. The same applies to your plants when they outgrow their pots. Their roots, the very anchors of their existence, become cramped, circling desperately within the limited confines, unable to absorb sufficient water or nutrients from the exhausted soil. This condition, often referred to as being ‘root-bound,’ is a silent plea from your plant for more space and fresh resources. Repotting offers a multitude of benefits that extend far beyond mere aesthetics. Firstly, it provides your plant with fresh, nutrient-rich potting mix. Over time, the soil in any pot degrades; nutrients are depleted, organic matter breaks down, and its structure can become compacted, hindering aeration and drainage. Fresh soil acts as a nutritional buffet, packed with essential minerals and providing the ideal environment for roots to spread and flourish. Secondly, it alleviates root congestion. When roots become too dense, they struggle to take up water and nutrients efficiently, leading to stunted growth, yellowing leaves, and susceptibility to diseases. Giving them room to breathe allows for optimal nutrient uptake and promotes vigorous growth above ground. Thirdly, repotting improves drainage and aeration. Compacted or degraded soil can lead to waterlogging, a common killer of houseplants, especially in humid climates like Bengaluru. Fresh soil with proper amendments ensures that water drains effectively, preventing root rot and creating a healthier root zone. Finally, it’s an opportunity for a health check-up. As you gently remove your plant from its old pot, you get a direct view of its root system, allowing you to trim any dead, diseased, or circling roots, effectively pruning for better health. This proactive maintenance can prevent future problems and ensure your green companions continue to flourish, bringing joy and a touch of nature’s tranquility to your urban abode. So, let’s embark on this essential gardening journey together, transforming what might seem like a daunting task into a rewarding act of nurturing love for your plants. Recognizing the Need for Repotting Understanding when your plant needs a new home is the first crucial step in the repotting process. Plants, much like us, give subtle (and sometimes not-so-subtle) cues when they are uncomfortable or require a change of scenery. Being observant of these signs can save your plant from stress and ensure its continued vitality. Ignoring these signals can lead to stunted growth, reduced flowering, and a general decline in health, which no gardener wants to see. For plants in Bengaluru’s tropical climate, where growth can be vigorous, these signs might appear sooner than you’d expect with slower-growing varieties in cooler regions. Signs Your Plant is Root-Bound One of the most common reasons to repot is when your plant becomes ‘root-bound.’ This means the roots have filled the entire pot, leaving little to no soil and no room for further expansion. Here are the tell-tale signs to look out for: 🔥 Our Trending Gardening Pickshow deep to plant potatoesdo plant cells have mitochondriawhen to plant garlicwhat to plant with tomatoeswhat plants like coffee grounds Roots Emerging from Drainage Holes: This is perhaps the clearest indicator. If you see roots peeking out from the bottom of the pot, or even growing upwards from the soil surface, it’s a definite sign that your plant has outgrown its current container. Water Running Straight Through: When you water your plant, does the water seem to drain almost immediately without soaking into the soil? This happens because the dense root ball leaves no space for the water to be absorbed, leading to insufficient hydration for the plant. Stunted Growth Despite Feeding: If your plant isn’t growing much, or its new leaves are significantly smaller than older ones, even though you’re regularly fertilizing it, it could be struggling due to cramped roots and depleted soil. Plant Falling Over Easily: A top-heavy plant that frequently topples over might be lacking the stability of a healthy root system spread within a larger pot. The roots are so dense they can’t properly anchor the plant. Soil Drying Out Too Quickly: If you find yourself watering your plant far more frequently than before, it might be because the pot is mostly roots and very little soil, which dries out rapidly. Visible Roots on Soil Surface: Beyond just emerging from the drainage holes, if you can see a thick mat of roots on the very surface of the soil, it’s a clear indication that the plant needs more space. When is the Best Time to Repot? Timing is everything when it comes to repotting. The general rule of thumb is to repot during your plant’s active growing season, which is typically spring or early summer. This allows the plant to recover from the stress of repotting quickly and utilize the new resources for robust growth. In Bengaluru, this often means late winter to early spring (February-March) before the intense summer heat, or post-monsoon (September-October) when the weather is more moderate. Avoid repotting when your plant is flowering or fruiting, as this can shock the plant and cause it to drop its blooms or developing fruit. Similarly, avoid repotting during periods of extreme heat or cold, as these environmental stressors can compound the transplant shock. Fast-growing plants, such as many tropical foliage plants, might need repotting annually, while slower growers like cacti or succulents might only need it every 2-3 years, or even less frequently. Always observe your plant’s specific needs rather than adhering to a rigid schedule. For more insights on seasonal plant care, check out our guide on https://ecorganicas.org/tag/aloe-vera-plant-stekken/. Gathering Your Repotting Arsenal Before you begin the exciting task of giving your plant a new home, it’s crucial to gather all the necessary supplies. Think of it as preparing for a surgical procedure; having everything at hand ensures a smooth and less stressful experience for both you and your plant. A well-prepared gardener is a successful gardener, especially when dealing with the delicate root systems of living organisms. Don’t rush this stage; taking the time to select the right tools and materials will make a significant difference in your plant’s post-repotting recovery and long-term health. Many of these items are readily available at local nurseries or gardening stores across Bengaluru, making preparation quite convenient. Choosing the Right Pot The new pot is more than just a container; it’s the foundation for your plant’s future growth. Selecting the appropriate size and material is paramount. Size Matters: A common mistake is choosing a pot that is too large. For most plants, go up only one size – typically 1 to 2 inches (2.5-5 cm) wider in diameter than the old pot. For example, if your plant is in a 6-inch pot, move it to an 8-inch pot. Moving to a much larger pot can lead to excess soil retaining too much moisture, increasing the risk of root rot, as the plant’s smaller root system won’t be able to absorb all the water effectively. Material Matters: Terracotta Pots: These unglazed clay pots are porous, allowing air and moisture to pass through. They are excellent for plants that prefer drier soil or are prone to overwatering, as they help the soil dry out faster. Ideal for succulents, cacti, and many herbs. They are heavier and more fragile. Plastic Pots: Lightweight, durable, and excellent at retaining moisture. They are a good choice for plants that prefer consistently moist soil, like ferns or many tropical foliage plants. They are also economical and come in a wide range of colors. Ceramic/Glazed Pots: These are often decorative and retain moisture much like plastic pots. They can be very heavy and expensive but add an aesthetic appeal. Ensure they have proper drainage holes. Drainage Holes: This is non-negotiable! Every pot MUST have drainage holes. Without them, water collects at the bottom, leading to root rot. If a beautiful pot lacks holes, consider using it as a decorative cachepot, placing your plant in a functional pot with drainage inside. Selecting the Ideal Potting Mix The potting mix is the lifeblood of your plant in its new home, providing nutrients, aeration, and moisture retention. Never use garden soil for potted plants; it’s too dense, can compact easily, and may contain pests or diseases. General Purpose Potting Mix: A good quality, sterile all-purpose potting mix is suitable for most houseplants. Look for brands that include ingredients like peat moss (or coco coir as an eco-friendly alternative), perlite, and vermiculite for a balanced blend of drainage and moisture retention. Specialized Mixes: Cactus & Succulent Mix: These are fast-draining and sandy, crucial for plants that thrive in arid conditions. Orchid Mix: Typically chunky, consisting of bark, charcoal, and perlite, designed for epiphytic orchids that need excellent air circulation around their roots. Aroid Mix: Often a blend of bark, perlite, coco coir, and worm castings, ideal for plants like Monsteras, Philodendrons, and Pothos that prefer airy, well-draining but moisture-retentive soil. Amendments: You can customize your potting mix by adding amendments: Perlite: Improves drainage and aeration. Vermiculite: Enhances moisture retention and nutrient exchange. Coco Coir: An excellent sustainable alternative to peat moss, offering good water retention and aeration. Compost/Worm Castings: Boosts nutrient content naturally. Always use fresh, sterile potting mix to avoid introducing pests, fungi, or diseases to your plant’s new environment. You can find a wide variety of quality potting mixes at our 🛒 Shop Now 🛒 Shop Now . Essential Tools Having the right tools makes the repotting process cleaner and more efficient. Trowel: For scooping soil. Pruning Shears or Scissors: Essential for trimming dead or circling roots. Sterilize them with rubbing alcohol before and after use to prevent disease spread. Watering Can: For pre- and post-repotting watering. Gardening Gloves: Protect your hands from soil and potential irritants. Old Newspaper or Tarp: To protect your work surface and make cleanup easier. Rubbing Alcohol or Hand Sanitizer: For sterilizing your tools. Small Brush or Cloth: For cleaning the plant and pot after repotting. With your arsenal ready, you’re well-equipped to give your plant the best possible start in its new home. The Step-by-Step Repotting Process With your tools and new pot ready, it’s time for the main event! Repotting, while seemingly intimidating, is a straightforward process when approached systematically and gently. Remember, you’re handling a living organism, and a gentle touch will go a long way in minimizing stress. This process is designed to be as smooth as possible for your plant, ensuring it transitions into its new home with ease and minimal shock. Take your time, and enjoy the hands-on experience of nurturing your green companions. Bengaluru’s climate means plants can be quite robust, but even the hardiest plants appreciate a careful hand during this process. Preparing for the Transplant Preparation is key to a stress-free repotting experience for both you and your plant. Hydrate Your Plant: Water your plant thoroughly a day or two before repotting. Well-hydrated roots are more pliable and less prone to breakage, and the soil will hold together better, making it easier to remove the plant from its old pot. Clean Your Workspace: Lay down old newspapers, a tarp, or a large plastic sheet on your work surface. Repotting can be messy, and this will make cleanup much simpler. Choose a well-lit area, perhaps outdoors on your balcony or in a shaded spot in your garden, especially if you have a larger plant. Sterilize Your Tools: Before you even touch your plant, wipe down your pruning shears or scissors with rubbing alcohol or a strong disinfectant. This prevents the transfer of any potential plant diseases from previous uses. Prepare the New Pot: Place a layer of fresh potting mix at the bottom of your new pot. The amount depends on the size of your plant and how much it needs to be raised so that its base sits at the correct level – usually about an inch or two below the rim of the new pot, allowing space for watering. Do not add gravel or broken pot pieces at the bottom; modern potting mixes and drainage holes are sufficient, and gravel can actually impede drainage by creating a perched water table. For more details on common repotting myths, refer to https://ecorganicas.org/privacy-policy/. Gently Removing the Plant This is the most delicate part of the process, requiring patience and a gentle hand. Loosen the Soil: If your plant is in a plastic pot, you can gently squeeze the sides to loosen the soil. For terracotta pots, a gentle tap around the rim might help. Invert and Support: Carefully place one hand over the top of the pot, with your fingers spread to support the base of the plant’s stem. Gently invert the pot. If the plant doesn’t slide out easily, tap the bottom of the pot or gently pull on the stem (close to the soil line) while wiggling the pot. Avoid yanking, as this can damage the stem or roots. Inspect the Root Ball: Once the plant is out, observe the root system. If it’s a dense, tightly wound mass of roots, it’s definitely root-bound. Tease Out the Roots: Gently loosen the outer roots with your fingers, or use a small stick or old fork. This encourages them to grow outwards into the new soil rather than continuing to circle. If the roots are extremely compacted, you might need to make a few vertical cuts (1-2 inches deep) into the root ball with your sterilized shears to encourage new growth. Trim Dead or Damaged Roots: Use your sterilized pruning shears to snip away any roots that are mushy, black, excessively dry, or appear diseased. Also, trim any roots that are severely circling or girdling the main root ball. Aim to remove about 1/4 to 1/3 of the outer root mass if it’s very dense, but be conservative, especially with delicate plants. Placing and Backfilling Now that your plant’s roots are prepped, it’s time to settle it into its new home. Position the Plant: Place the plant in the center of the new pot, ensuring that the top of the root ball is at the same level as it was in the old pot, or slightly lower if you’re adding fresh soil on top. The goal is to keep the soil line about 1-2 inches below the rim of the new pot to allow for proper watering without overflow. Add New Potting Mix: Begin adding fresh potting mix around the root ball, filling in all the gaps. Gently tap the pot on your work surface a few times to help the soil settle and remove any large air pockets. You can also use your fingers or a stick to gently firm the soil, but avoid compacting it too much, as this reduces aeration. Don’t Bury the Stem: Ensure that the crown of the plant (where the stem meets the roots) is not buried under new soil, as this can lead to stem rot. The soil level should remain consistent with the original planting depth. Water Thoroughly: Once you’ve filled the pot with soil, water the plant generously until water drains from the bottom. This helps to settle the soil around the roots and eliminates any remaining air pockets. You might notice the soil level dropping slightly after watering; if so, add a bit more potting mix to bring it back to the desired level. Congratulations, your plant has successfully been repotted! Now, onto the crucial post-repotting care. Post-Repotting Care and Adjustment The repotting process, no matter how carefully executed, can be a stressful event for your plant. It’s akin to a major surgery, and just like a patient recovering, your plant needs a period of gentle care and observation to adjust to its new environment. This phase is critical for ensuring your plant not only survives the transplant but thrives in its new, larger home. Paying close attention to its needs during these initial weeks will make all the difference in its long-term health and vigor. Especially in Bengaluru’s varied climate, protecting your plant from immediate environmental extremes post-repotting is vital. Initial Watering and Placement The first few steps after repotting are crucial for helping your plant establish itself. Initial Watering: You should have watered the plant thoroughly immediately after repotting to settle the soil. Ensure water drains freely from the bottom. For the next few days to a week, monitor the soil moisture closely. Don’t let it dry out completely, but also avoid overwatering. The goal is consistent, moderate moisture as the roots begin to explore their new space. Strategic Placement: Place your newly repotted plant in a location with bright, indirect light. Avoid direct, harsh sunlight for at least a week or two, as its root system is temporarily compromised and less efficient at absorbing water, making it more susceptible to sunburn and dehydration. A shaded balcony, a north-facing window, or a spot slightly away from a sunny window would be ideal. Humidity Control: If you have a plant that loves humidity, consider misting it regularly or placing it near a humidifier during its recovery period. The slight increase in humidity can help reduce transpiration stress on the leaves while the roots are busy recovering. Avoid Fertilizing: Resist the urge to fertilize your plant immediately after repotting. The fresh potting mix contains enough nutrients to support new growth for several weeks (typically 4-6 weeks). Fertilizing too soon can burn delicate, recovering roots and cause further stress. Give your plant time…
 - how to propagate spider plant
 how to propagate spider plant How to Propagate Spider Plant In the verdant embrace of Bengaluru, where the quest for greenery often intertwines with the hustle of urban life, the spider plant (Chlorophytum comosum) stands as a beacon of natural elegance and remarkable resilience. Its cascading foliage, often adorned with charming “spiderettes” or “plantlets,” makes it a beloved choice for both novice and seasoned gardeners across India. Propagating these delightful offspring isn’t just a simple horticultural task; it’s a deeply rewarding journey that transforms a single plant into a thriving family, multiplying not just your green collection but also the joy and serenity they bring to your living spaces. Imagine transforming a single pot into a lush hanging garden, or having an endless supply of thoughtful, living gifts for friends and family – all without spending a rupee on new plants. This is the magic of spider plant propagation. Beyond the sheer pleasure of nurturing new life, propagating spider plants offers a myriad of tangible benefits. Firstly, it’s incredibly cost-effective. Instead of purchasing new plants, you can easily expand your indoor jungle or outdoor balcony garden from the bounty of an existing mother plant. This aligns perfectly with the sustainable living ethos many Bengalureans are adopting, reducing waste and promoting self-sufficiency. Secondly, spider plants are renowned for their air-purifying capabilities. In a city like Bengaluru, where air quality can sometimes be a concern, having more of these natural air filters around your home and office is not just aesthetically pleasing but also a significant boon for your health and well-being. They efficiently remove toxins such as formaldehyde and xylene, contributing to a fresher, cleaner indoor environment. Thirdly, the act of propagation itself is wonderfully therapeutic. There’s an undeniable sense of accomplishment and calm that comes from carefully tending to these small plantlets, watching them develop roots, and eventually grow into robust, independent plants. It’s a mindful activity that offers a much-needed break from the digital demands of modern life, connecting us back to nature’s gentle rhythms. For those in Bengaluru with limited garden space, spider plants are ideal. Their graceful arching leaves and trailing plantlets make them perfect for hanging baskets, elevated shelves, or even as charming additions to your desk. Propagating them means you can easily fill every nook and cranny with vibrant greenery, transforming even the smallest apartment balcony into a refreshing oasis. This comprehensive guide will walk you through every step of propagating your spider plants, ensuring you master this satisfying skill and unlock the full potential of your green companions. From understanding your mother plant to choosing the best propagation method, we’ll cover it all, making you a spider plant propagation expert in no time. The Allure of Spider Plant Propagation: Why Every Bengaluru Gardener Should Try It The humble spider plant, with its distinctive arching leaves and charming “spiderettes” dangling like miniature chandeliers, holds a special place in the hearts of gardeners worldwide, and particularly in the vibrant, plant-loving community of Bengaluru. Its ease of care combined with its prolific reproduction makes it an ideal candidate for propagation, a practice that offers an abundance of rewards far beyond simply increasing your plant count. For the discerning Bengaluru gardener, propagating spider plants is more than just a hobby; it’s a sustainable, fulfilling, and economically smart choice that resonates with our growing appreciation for green living. Expanding Your Green Oasis on a Budget One of the most immediate and compelling benefits of propagating spider plants is the financial savings. In a city where the cost of living, including ornamental plants, can be significant, the ability to multiply your plant collection for free is invaluable. A single healthy mother plant can produce dozens of spiderettes over its lifespan, providing an endless supply of new plants. This means you can effortlessly fill your home, office, and even your balcony with lush greenery, creating a tranquil and aesthetically pleasing environment without repeatedly dipping into your wallet. Imagine transforming a bare corner into a vibrant green haven, or lining your windowsills with charming new pots, all derived from the generosity of one parent plant. This not only makes gardening more accessible but also encourages a more resourceful and sustainable approach to expanding your plant collection. Gifting Nature’s Bounty In Indian culture, especially in Bengaluru, gifting holds immense significance, and what could be more thoughtful and personal than a living gift? Propagated spider plants make exquisite presents for housewarmings, birthdays, festivals like Diwali, or just as a token of appreciation. Each plant carries with it the story of its growth and the care you’ve invested, making it a unique and heartfelt gesture. Unlike cut flowers that fade, a potted spider plant continues to grow and thrive, serving as a lasting reminder of your friendship and generosity. They are particularly well-received because of their low maintenance, making them suitable even for those new to gardening. This practice fosters community and connection, allowing you to share the joy of gardening with those you cherish. Boosting Indoor Air Quality in Urban Bengaluru Bengaluru, despite its garden city moniker, faces increasing urban pollution challenges. This makes the spider plant’s renowned air-purifying capabilities more relevant than ever. Studies by NASA have highlighted the spider plant’s effectiveness in removing common indoor air toxins such as formaldehyde, xylene, and carbon monoxide. By propagating more spider plants, you are effectively creating more natural air filters for your home and workspace. These plants work silently and efficiently, contributing to a healthier living environment by enhancing oxygen levels and absorbing harmful volatile organic compounds (VOCs). This benefit is not just about aesthetics; it’s about investing in the health and well-being of yourself and your family, creating cleaner, fresher air in the very spaces you inhabit daily. Decoding Your Mother Plant: When and How to Harvest Spiderettes Successful propagation begins with a thorough understanding of your mother spider plant. Just like a parent nurturing its young, the mother plant plays a crucial role in the health and vitality of its spiderettes. Knowing when and how to harvest these little plantlets is paramount to ensuring a high success rate in your propagation efforts. This stage requires a keen eye and a gentle touch, ensuring that both the mother plant and the future propagations remain robust and healthy. Identifying Mature Spiderettes Not all plantlets hanging from your mother spider plant are ready for harvest. Patience is key. A mature spiderette will typically exhibit several tell-tale signs: Size: It should be at least 2-3 inches in diameter, resembling a miniature version of the mother plant. Tiny, nascent plantlets are often too fragile and lack the energy reserves to root successfully on their own. Root Nubs: Perhaps the most crucial indicator, look for small, aerial root nubs or tiny, visible roots already emerging from the base of the spiderette. These are often brown or white and signify that the plantlet is eager and ready to establish its own root system. Leaf Development: The spiderette should have several well-formed leaves, not just a couple of nascent shoots. These leaves are vital for photosynthesis once the plantlet is separated, allowing it to produce its own food. Harvesting a spiderette before it shows these signs can lead to failure, as it won’t have the necessary resources to survive independently. The Right Time for Harvest While spider plants are quite forgiving and can be propagated year-round, certain periods offer optimal conditions for success, especially considering Bengaluru’s climate. Growing Season: The active growing season, typically from spring through early autumn, is the best time. In Bengaluru, this often means the post-monsoon period through to early winter, when temperatures are moderate and humidity levels are favorable. During these months, the mother plant is actively producing new growth and has ample energy to dedicate to its spiderettes, making them stronger and more viable. Avoid Stress: Refrain from harvesting if the mother plant itself is stressed, showing signs of yellowing leaves, pest infestation, or stunted growth. Allow the mother plant to recover first, ensuring it has enough vitality to support both itself and its offspring. Choosing the right time also means observing the plant and its environment. A happy, healthy mother plant will produce happy, healthy spiderettes. Essential Tools for a Clean Cut When it’s time to separate the spiderettes, hygiene and precision are crucial to prevent disease and minimize stress on both the mother plant and the plantlets. Sharp Scissors or Pruning Shears: Invest in a good pair of sharp, clean scissors or small pruning shears. A clean cut prevents jagged edges that can become entry points for pathogens and allows the plant to heal more quickly. Sterilization: Before and after each use, sterilize your tools. You can do this by wiping the blades with rubbing alcohol (isopropyl alcohol) or a diluted bleach solution. This simple step is often overlooked but is vital in preventing the spread of diseases from one plant to another. Gloves (Optional): While not strictly necessary for spider plants, gloves can protect your hands and maintain cleanliness. To harvest, locate a mature spiderette and follow the stem that connects it to the mother plant. Make a clean cut about an inch or two from the base of the spiderette, ensuring you don’t damage the plantlet itself. Handle the spiderette gently, as its delicate root nubs can be easily bruised. Once harvested, your spiderettes are ready for their next stage of growth, embarking on a new journey towards becoming independent, thriving plants. For more insights into keeping your houseplants healthy, check out https://ecorganicas.org/tag/aloe-vera-plant-stekken/. The Water Wonders: Propagating Spider Plants in H2O Water propagation is arguably the most popular and visually rewarding method for rooting spider plant spiderettes. It’s incredibly simple, offers a high success rate, and provides a fascinating front-row seat to the miracle of root development. For gardeners in Bengaluru, especially those living in apartments with limited space, this method is clean, compact, and requires minimal setup. Watching those tiny white roots emerge and grow in a clear glass of water is a truly satisfying experience that makes water propagation a favourite among enthusiasts. Step-by-Step Guide to Water Rooting Once you have harvested your healthy spiderettes, the process of water propagation is straightforward: Prepare Your Container: Choose a clean, clear glass jar, bottle, or vase. Clear containers are preferred because they allow you to easily monitor root growth and water clarity. Ensure the container is clean to prevent bacterial growth. Add Water: Fill the container with clean, room-temperature water. Tap water is usually fine for spider plants, but if your local tap water is heavily chlorinated, consider letting it sit out for 24 hours to allow chlorine to dissipate, or use filtered water. In Bengaluru, where water quality can vary, filtered water might be a safer bet for optimal results. Place the Spiderettes: Carefully place the base of each spiderette into the water. Ensure that only the base where the roots will emerge, and ideally no leaves, are submerged. If any lower leaves are touching the water, gently pinch them off to prevent them from rotting, which can contaminate the water. Position for Light: Place your container in a location that receives bright, indirect light. A windowsill that gets filtered sunlight or a spot a few feet away from a bright window is ideal. Avoid direct, harsh sunlight, especially the intense afternoon sun in Bengaluru, as this can overheat the water and stress the plantlet. Regular Water Changes: This is a critical step. Change the water every 2-3 days, or at least once a week. Fresh water replenishes oxygen levels and prevents the buildup of bacteria and algae, which can cause the spiderettes to rot. When changing the water, gently rinse the roots if they have started to form. With consistent care, you should begin to see small white roots emerging from the base of the spiderette within 1-2 weeks. Over the next few weeks, these roots will lengthen and multiply, signaling that your plantlet is ready for its next adventure in soil. Tips for Optimal Water Propagation To maximize your success with water propagation, consider these expert tips: Maintain Cleanliness: Always use clean containers and fresh water. A dirty environment is a breeding ground for pathogens that can quickly lead to rot. Monitor Temperature: Keep the water at a consistent room temperature. Extreme fluctuations can stress the plantlets. Bengaluru’s mild climate is generally conducive, but avoid placing them near AC vents or direct heat sources. Patience is a Virtue: Rooting times can vary depending on the spiderette’s maturity and environmental conditions. Some may root quickly, while others might take a bit longer. Don’t be disheartened if roots don’t appear overnight. Avoid Overcrowding: Give each spiderette enough space in the water. Overcrowding can lead to poor air circulation and increased risk of rot. Rooting Hormone (Optional): While not strictly necessary for spider plants as they root easily, a tiny dab of rooting hormone on the cut end can sometimes accelerate root development, especially for less vigorous plantlets. However, for most spiderettes, water alone is sufficient. Once the roots are about 1-2 inches long and well-established, your spiderettes are ready to be transitioned to soil. This transition should be done carefully to minimize shock. The water propagation method is a delightful way to observe nature’s magic firsthand, making it a truly gratifying experience for any gardener. For a deeper dive into houseplant care, explore https://ecorganicas.org/shop/. Grounding Your Greenery: Direct Soil Propagation for Stronger Starts While water propagation offers a fascinating visual journey, direct soil propagation is often favoured for its ability to produce more robust and less transplant-shock-prone spider plants. By rooting directly in soil, the plantlet immediately adapts to its permanent medium, developing a stronger root system that is accustomed to extracting nutrients and moisture from the soil environment from day one. This method mimics how spiderettes would naturally root if they touched the ground, making it a very natural and effective approach, particularly appealing for those in Bengaluru looking for hardy, low-maintenance additions to their garden or balcony. Preparing the Perfect Potting Mix The foundation of successful soil propagation lies in the quality of your potting mix. A well-draining, nutrient-rich, and aerated mix is crucial for healthy root development. Components: A good general-purpose potting mix works well. For spider plants, aim for a blend that offers excellent drainage while retaining some moisture. A common recipe for Bengaluru gardeners might include: 2 parts high-quality potting soil (loamy garden soil can work if amended) 1 part coco peat or vermicompost (for moisture retention and nutrients) 1 part perlite or coarse sand (for drainage and aeration) Coco peat is readily available and helps lighten the soil, preventing compaction, which is vital for root growth. Vermicompost adds essential organic nutrients, giving your young plant a healthy start. Sterilization (Optional but Recommended): If using garden soil, consider sterilizing it to kill any potential pests, weed seeds, or disease pathogens. This can be done by baking it in an oven or microwaving it. Moisture: Ensure the potting mix is slightly moist before planting, not soggy. It should feel like a damp sponge when squeezed. Planting Your Spiderettes Directly Once your potting mix is ready, the planting process is simple: Choose the Right Pot: Select small pots, typically 3-4 inches in diameter, with drainage holes. Terra cotta pots are excellent as they allow the soil to breathe, but plastic pots also work fine. For a Bengaluru climate, good drainage is non-negotiable to prevent root rot, especially during the monsoon. For advice on selecting the right pots, you can refer to https://ecorganicas.org/privacy-policy/. Fill the Pot: Fill your chosen pot with the prepared potting mix, leaving about an inch of space from the rim. Create a Hole: Use your finger or a small stick to create a shallow hole in the center of the soil, just deep enough to accommodate the base of the spiderette. Plant the Spiderette: Gently place the base of the spiderette into the hole. Ensure that the root nubs (if present) are buried, and the base of the plantlet is just at the soil line. Avoid burying any leaves. Gently Firm the Soil: Lightly firm the soil around the base of the spiderette to provide stability and ensure good contact between the plantlet and the soil. Do not pack it down too tightly, as this can impede root growth and drainage. Water Thoroughly: Water the newly planted spiderette thoroughly until water drains from the bottom of the pot. This helps settle the soil around the plantlet. Initial Care for Soil-Rooted Plants The first few weeks are crucial for the establishment of your soil-rooted spiderettes: Light: Place the potted spiderettes in a location that receives bright, indirect light. Avoid direct, harsh sunlight, especially the intense afternoon sun in Bengaluru, which can scorch delicate new leaves. Watering: Keep the soil consistently moist but never soggy. Check the soil moisture every 2-3 days by feeling the top inch of soil. Water when the top inch feels dry to the touch. Overwatering is a common killer of young plants. Humidity: While spider plants are adaptable, they appreciate moderate humidity. In Bengaluru’s drier months, a light misting occasionally or placing the pots on a pebble tray with water can be beneficial. Patience: It can take anywhere from 3-6 weeks for the spiderette to establish a strong root system. You’ll know it’s rooted when you see new leaf growth and feel resistance when you gently tug on the plantlet. Direct soil propagation offers a straightforward path to creating sturdy spider plants that are ready to thrive independently, making it an excellent method for expanding your green collection with minimal fuss. For further reading on robust plant growth, consider this resource: https://ecorganicas.com/. The Nurturing Nook: Propagating Spiderettes While Attached to the Mother Plant Among the various methods of propagating spider plants, the “attached propagation” technique stands out for its simplicity and remarkably high success rate. Often referred to as the “lazy gardener’s method,” it leverages the mother plant’s continuous support, allowing the spiderette to develop roots while still receiving vital nutrients…
 - how to plant sugar cane in minecraft
 how to plant sugar cane in minecraft How to Plant Sugar Cane in Minecraft Namaste, fellow virtual gardeners and crafting connoisseurs! Just like how we cherish a thriving kitchen garden in our Bengaluru homes, brimming with fresh herbs and vegetables, the world of Minecraft offers its own unique delights in cultivation. Today, we’re delving into the verdant, blocky fields of one of the game’s most understated yet utterly essential crops: Sugar Cane. Often overlooked in favor of flashier diamonds or more aggressive mob farming, sugar cane is the quiet workhorse that underpins so many crucial advancements in your Minecraft journey. Imagine a world without enchanted books, without fast travel using rockets, or even without the simple pleasure of a baked cake – that’s a world without sugar cane! From the moment you punch your first tree, your journey in Minecraft is about progression, and sugar cane stands as a foundational pillar in this grand architectural and adventurous endeavor. It’s not just about aesthetics, though a well-tended sugar cane farm can certainly add a touch of organised beauty to your base. It’s about unlocking entire new avenues of gameplay. Need to chart your sprawling base or the vast, unexplored biomes surrounding you? You’ll need paper, and lots of it, all derived from our humble sugar cane. Dreaming of powerful enchantments to boost your tools and armour? Those mystical enchanting tables and the bookshelves that empower them demand stacks upon stacks of paper and books. Planning an epic journey across the skies with your elytra? Firework rockets, fueled by gunpowder and paper, are your ticket to aerial freedom. Even the simplest of culinary delights, like a celebratory cake after a long mining trip, requires sugar, again, courtesy of sugar cane. Understanding how to cultivate this versatile plant effectively isn’t just a useful skill; it’s a gateway to advanced gameplay, self-sufficiency, and ultimately, a more enriched and powerful presence in your Minecraft world. Moreover, setting up an efficient sugar cane farm early on means you’re passively generating resources that will save you countless hours of foraging later, much like having a consistent supply of rainwater for your real-world garden during the dry months. So, let’s dig in and discover the secrets to a bountiful sugar cane harvest, transforming your virtual landscape into a hub of productivity and progress! Understanding Sugar Cane’s Unique Growth Requirements Before we can even think about planting, it’s crucial to grasp the fundamental mechanics that govern sugar cane’s existence in Minecraft. Unlike many other crops that demand tilled soil, specific light levels, or even direct sunlight, sugar cane operates on a slightly different, yet wonderfully simple, set of rules. Think of it as a robust bamboo-like plant that thrives in specific conditions, much like how certain herbs in our Bengaluru gardens prefer partial shade while others bask in the full sun. Understanding these unique environmental needs is the first step towards establishing a flourishing sugar cane farm, whether it’s a small patch for personal use or a sprawling industrial complex. The All-Important Water Source The single most critical requirement for sugar cane to grow is the presence of an adjacent water block. This is non-negotiable. Sugar cane must be planted on a block directly next to a water source block or a flowing water block. It doesn’t need to be submerged, nor does the water need to be beneath it. It simply needs to share a side with any water block. This fundamental rule is what makes designing sugar cane farms both challenging and rewarding. You can have a single row of water with sugar cane planted on either side, or elaborate designs incorporating water streams for automated collection. The water ensures the sugar cane can establish itself and grow upwards. Without this immediate water connection, any attempt to plant sugar cane will fail, returning the item to your inventory. This simulates the real-world need for moisture, especially for a water-loving plant like sugarcane. 🔥 Our Trending Gardening Pickshow deep to plant potatoesdo plant cells have mitochondriawhen to plant garlicwhat to plant with tomatoeswhat plants like coffee grounds Optimal Block Placement While water is paramount, the type of block you plant the sugar cane on also matters, though less critically. Sugar cane can be planted on four specific types of blocks: dirt, grass blocks, sand, and podzol. Of these, sand is often a popular choice, not because it confers any growth bonus (it doesn’t), but because it offers a visual contrast, making it easier to distinguish your sugar cane farm from surrounding terrain. You could also argue that sand is often found near water bodies, making it a natural fit. Grass blocks and dirt are equally viable and are often abundant. Podzol, found mainly in Spruce biomes, is less commonly used due to its rarity and specific biome association. The key takeaway here is that you don’t need tilled farmland; any of these four block types will suffice, provided they are directly adjacent to water. This flexibility allows for diverse farm designs and integration into various landscapes, from desert oases to lush forests. Remember, the bottom-most block of the sugar cane stem needs to be on one of these approved blocks, and it needs to be directly next to water. Gathering Your First Sugar Cane Stalks Every grand Minecraft empire begins with humble steps, and your journey into sugar cane cultivation is no different. Before you can plant your first block of sugar cane, you first need to acquire some. This initial foraging expedition is a rite of passage, much like digging up your first sapling in a real garden. Knowing where to look and how to harvest efficiently will set you up for success, ensuring you have enough starter material to begin your very own productive farm. Where to Find Wild Sugar Cane Sugar cane naturally generates in the wild, almost exclusively near water sources. Think of it as Minecraft’s indigenous riverine vegetation. You’ll typically find it growing along the banks of rivers, lakes, and oceans in various biomes. Look for tall, green, segmented stalks growing one to three blocks high, always adjacent to a water block. It tends to generate in small clusters or sometimes long stretches, particularly along coastlines or large bodies of water. When you’re exploring new chunks or traversing vast distances, keep an eye out for these tell-tale green reeds. They are easily spotted against the often brown or green textures of land blocks. Deserts and savannas, despite their arid nature, can still have rivers or small oases where sugar cane might generate, so don’t limit your search to lush biomes alone. The key is always the water. A good strategy during early-game exploration is to follow rivers or coastlines, as this not only leads you to potential sugar cane patches but also to other valuable resources and interesting terrain. It’s an efficient way to scout and gather simultaneously. Efficient Harvesting Techniques Once you’ve located a patch of wild sugar cane, harvesting it correctly is important to ensure both immediate yield and future regrowth. Sugar cane grows up to three blocks tall. To harvest it efficiently and sustainably, you should break the top two blocks of any three-block tall stalk. By doing this, you leave the bottom block intact. This bottom block will then continue to grow upwards, allowing you to return later and harvest again without needing to replant. It’s a simple yet effective method for creating a renewable source from naturally generated patches, buying you time until you can establish your own dedicated farm. If the sugar cane is only two blocks tall, break the top one. If it’s one block tall, you’ll need to break that one block and replant it if you wish to start a farm. The goal is to always leave at least one block at the base for it to regrow. For larger patches, you can use an axe or even your bare hand – sugar cane breaks instantly, regardless of the tool. However, an axe might be faster if you’re holding it. Gather as much as you can; you’ll need at least a few stalks to start your farm, and more for expansion and crafting. Remember, each sugar cane block you collect can be replanted or crafted into paper, making every stalk valuable. This initial gathering phase is crucial, so take your time and collect a healthy starter supply. Building Your First Basic Sugar Cane Farm With your pockets full of freshly harvested sugar cane stalks, it’s time to transition from foraging to farming. Establishing your first basic sugar cane farm is a straightforward process that will provide you with a reliable, renewable source of this vital resource. Think of it as setting up your first small raised bed in the garden; simple, effective, and deeply satisfying. This foundational knowledge will serve you well as you inevitably move towards more complex and automated designs later on. For now, let’s focus on getting those first green shoots firmly planted and growing. Simple Row Design The most fundamental and easiest sugar cane farm to construct is a simple row design. It requires minimal resources and can be scaled up easily by adding more rows. Here’s how you set it up: Dig a Trench: Start by digging a straight line of blocks. This trench will house your water source. The length of the trench determines the length of your sugar cane row. A common practice is to make it 8 blocks long. Add Water: Place a water source block at one end of the trench. If the trench is 8 blocks long, the water will flow exactly to the other end, creating 8 flowing water blocks. Alternatively, you can place water source blocks at both ends of a longer trench to create still water in the middle, or fill the entire trench with source blocks for maximum flexibility. Prepare Planting Blocks: On either side of this water trench, place a row of suitable blocks (dirt, grass, sand, or podzol). These are the blocks where your sugar cane will be planted. Ensure these blocks are directly adjacent to the water. Plant Sugar Cane: Right-click with your sugar cane item on these prepared blocks. You’ll see the sugar cane stem appear. Remember, each sugar cane block you plant must be next to a water block. This creates a neat, linear farm. You can repeat this pattern to create multiple parallel rows, with a 1-block gap between the planting blocks for easy access, or even build a checkerboard pattern of water and planting blocks for a very compact, though slightly harder to harvest manually, farm. The beauty of this design lies in its simplicity and expandability. You can start with a small 10-block row and easily extend it as your needs grow, much like adding another row to your vegetable patch as your family’s appetite increases. Maximizing Early Yields While sugar cane grows relatively slowly compared to some other crops, there are ways to maximize your early yields and ensure a steady supply. Plant in Abundance: The more sugar cane you plant, the more you’ll harvest. Don’t be shy; if you have the space and the initial stalks, dedicate a generous area to your farm. Regular Harvesting: Once sugar cane grows to its maximum height of three blocks, manually harvest the top two blocks. This allows the bottom block to regrow, providing a continuous yield. Make it a habit to check your farm regularly. Light Levels (Indirectly): While sugar cane doesn’t strictly *need* light to grow, like real plants, growth ticks occur more frequently in loaded chunks and during daylight hours in a practical sense, which can affect perceived growth rate. Ensuring your farm is well-lit (either naturally or with torches/glowstone) can help ensure it’s always in a growth-friendly environment, even if the light itself isn’t a direct trigger for the plant. Chunk Loading: Sugar cane only grows when the chunk it is in is loaded. If you’re building a large farm, consider building it close to your main base or a spawn chunk if you want continuous growth even when you’re away exploring. By following these simple steps, you’ll soon have a thriving sugar cane farm, providing you with all the paper and sugar you could desire for your early-to-mid game crafting needs. It’s a truly rewarding feeling to watch your virtual crops flourish, mirroring the joy of a successful harvest in your real-world garden. For more tips on early-game resource gathering, check out our guide on https://ecorganicas.org/category/organic/. Scaling Up: Advanced Sugar Cane Farm Designs As your Minecraft ambitions grow, so too will your demand for sugar cane. What started as a modest row will eventually need to evolve into something far more efficient and, dare we say, automated. This is where the magic of redstone engineering comes into play, transforming manual labor into elegant, self-sustaining systems. Just as modern farming techniques leverage machinery for large-scale operations, Minecraft offers tools to automate your sugar cane production, freeing up your time for grander adventures. This leap from manual harvesting to automated systems is a significant milestone for any aspiring Minecraft engineer. Semi-Automatic Piston Farms The first step into automation often involves pistons. A semi-automatic piston farm still requires you to collect the drops, but it handles the harvesting for you. Here’s the basic concept: Piston Placement: For each sugar cane plant, place a piston one block above the growing sugar cane, facing towards it. These pistons will be responsible for breaking the upper two blocks of the sugar cane when activated. Redstone Power: Connect all the pistons in a row with redstone dust. This redstone line can then be connected to a simple switch (lever or button) or a more sophisticated redstone clock mechanism. Water Flow for Collection: Below the pistons, you’ll need a water stream that flows along the base of your sugar cane. When the pistons break the sugar cane, the harvested items will fall into this water stream and be carried to a collection point, often a hopper leading into a chest. When you activate the redstone, all pistons extend, breaking the sugar cane. The items float into the water stream, and you simply collect them at the end. This significantly reduces the manual effort of walking along your farm and breaking each stalk individually. It’s a great intermediate step that introduces you to basic redstone without overwhelming complexity. For those curious about the fundamentals of redstone, take a look at our beginner’s guide on https://ecorganicas.org/privacy-policy/. Fully Automatic Observer-Based Systems For the truly self-sufficient farm, you’ll want to integrate observers. Observers are blocks that detect block changes directly in front of them and emit a redstone pulse. This allows for fully automatic harvesting without any player input once set up. Observer Placement: For each sugar cane plant, place an observer block one block above the bottom sugar cane stem, facing the second block of the sugar cane. The observer’s “face” should be looking at where the sugar cane will grow. Piston-Observer Connection: The redstone output (the small red dot) of the observer should be directed towards a piston. When the sugar cane grows to two blocks high, the observer detects this change and emits a quick redstone pulse. Piston Activation: This pulse activates the piston, which is placed one block above the observer, facing the sugar cane. The piston breaks the second and third blocks of the sugar cane (if it has grown that high). Item Collection: As with the semi-automatic farm, a water stream below the sugar cane carries the broken items to hoppers and chests. This system is entirely self-sufficient. As soon as a sugar cane plant grows, it triggers its corresponding observer and piston, harvests itself, and sends the items to storage. You can build these farms in long rows, or even multi-layered designs, creating massive yields. This level of automation is incredibly satisfying, mirroring the efficiency of a high-tech agricultural facility. It transforms sugar cane farming from a chore into a passive income stream, allowing you to focus on mining, building, or exploring the vast Minecraft world. You might even consider integrating these farms into a larger automated production line, a topic we explore in our article on https://ecorganicas.org/pill-bugs-in-garden/. The Many Uses of Sugar Cane: Beyond Paper When most players think of sugar cane in Minecraft, “paper” is usually the first thing that comes to mind. And while paper is undeniably a crucial product, to limit sugar cane’s utility to just that would be a gross understatement. This versatile crop, much like the multifaceted uses of coconut in India, plays a pivotal role in various aspects of the game, from essential crafting to enchanting and even aerial travel. Understanding its full potential will help you appreciate the true value of maintaining a robust sugar cane farm. Crafting Essentials: Paper and Books Let’s start with the obvious, yet incredibly important, applications. Three sugar cane stalks, placed horizontally in a crafting grid, yield one piece of Paper. Paper itself is the backbone of several critical items: Maps: Combine 8 paper with a compass to create an empty map. This is essential for navigating your world, especially when exploring new areas or marking important locations. As your world grows, you’ll need more maps, often zoomed out, which requires even more paper. Books: Three pieces of paper and one piece of leather (from cows or rabbits) craft a Book. Books are fundamental for intellectual pursuits in Minecraft. They are used to craft Bookshelves (6 planks + 3 books), which are vital for enhancing your Enchanting Table. A fully powered Enchanting Table requires 15 bookshelves placed strategically around it, meaning a significant investment in books and, by extension, sugar cane. Enchanted Books: Books are also used to create enchanted books directly at an enchanting table, allowing you to store enchantments for later application with an anvil. Cartography Table: Paper is used in the cartography table to duplicate, zoom out, and lock maps, making it an indispensable resource for cartographers. Without paper and books, navigating, enchanting, and even basic documentation of…
 - how to plant groundnut
 how to plant groundnut How to Plant Groundnut There’s an unparalleled joy in harvesting your own food, a sense of connection to the earth and a deep satisfaction that store-bought produce simply can’t match. Among the many delightful crops you can cultivate in your home garden, groundnuts – more commonly known as peanuts – stand out as a particularly rewarding choice. For gardeners in Bengaluru, with its generally favourable climate, growing your own groundnuts is not just a feasible dream, but a truly enriching experience. Imagine the aroma of freshly roasted peanuts, still warm from your garden, or the rich, earthy taste of homemade peanut butter; these are simple pleasures that elevate everyday living. Groundnuts (Arachis hypogaea) are not only a versatile culinary ingredient, featuring prominently in everything from spicy chutneys and crunchy snacks to wholesome curries and traditional sweets across India, but they are also a powerhouse of nutrition. They are an excellent source of plant-based protein, healthy monounsaturated fats, dietary fibre, and a wide array of essential vitamins and minerals, including B vitamins, vitamin E, magnesium, phosphorus, and potassium. Incorporating them into your diet offers numerous health benefits, from supporting heart health to providing sustained energy. Beyond the personal gratification and nutritional bounty, growing groundnuts at home can also be a cost-effective endeavour, significantly reducing your grocery bill for this staple item. It also gives you complete control over the growing process, ensuring your harvest is free from harmful pesticides and chemicals, a major concern for health-conscious individuals. Furthermore, groundnuts are legumes, meaning they have a symbiotic relationship with nitrogen-fixing bacteria in the soil. This incredible natural process enriches your garden soil with nitrogen, a vital nutrient for plant growth, thereby benefiting subsequent crops you plant in the same area. This makes them an excellent choice for improving soil health and promoting sustainable gardening practices. Whether you have a sprawling backyard or a compact balcony garden, with the right approach and a little patience, you too can cultivate a thriving groundnut patch. This comprehensive guide will walk you through every step of the process, from preparing your soil to harvesting your delicious bounty, ensuring your groundnut planting journey is a resounding success here in Bengaluru. Understanding Groundnuts: The Basics Before You Begin Before you embark on your groundnut cultivation journey, it’s crucial to understand the fundamental requirements of this unique plant. Groundnuts, botanically known as Arachis hypogaea, are fascinating because their fruits, the peanuts, develop underground, a process known as geocarpy. This distinct growth habit dictates many of their specific needs. Primarily, groundnuts are sun-loving plants that thrive in warm climates. They require a long, frost-free growing season, typically ranging from 90 to 150 days depending on the variety. Bengaluru’s tropical savanna climate, characterized by distinct wet and dry seasons and consistently warm temperatures throughout the year, is generally quite favourable for groundnut cultivation, provided you choose the right planting window. There are two main types of groundnut plants: bunch (or bush) types and runner types. Bunch varieties grow more upright and compact, making them suitable for smaller gardens or even container growing. They typically mature faster. Runner varieties, as the name suggests, spread out along the ground with long, prostrate stems. They generally produce higher yields but require more space and a longer growing season. Understanding which type you’re growing will influence your spacing and overall garden layout. For the Bengaluru gardener, both types can be successful, but bunch varieties might be more manageable for urban spaces. Soil is perhaps the most critical factor for successful groundnut growth. They absolutely prefer a light, loose, well-draining, sandy loam soil. Heavy clay soils, which tend to compact and retain too much moisture, can hinder the development of the underground pods, leading to poor yields and potential rot. The ideal soil pH for groundnuts is slightly acidic to neutral, typically ranging from 5.9 to 7.0. It’s a good idea to perform a soil test before planting to understand your soil’s composition and pH, allowing you to make necessary amendments. Remember, groundnuts are legumes and have the remarkable ability to fix atmospheric nitrogen into the soil with the help of beneficial bacteria. This means they generally don’t require much, if any, nitrogen fertilizer. In fact, too much nitrogen can encourage leafy growth at the expense of pod development. Instead, focus on providing adequate phosphorus and potassium. The growing season in Bengaluru typically sees groundnuts planted after the main monsoon rains, around September-October, or in late February-March for a summer crop, avoiding the heaviest monsoon downpours which can lead to waterlogging. Selecting the Right Seeds and Preparing Your Soil The success of your groundnut harvest begins long before a single seed touches the soil. It starts with careful seed selection and meticulous soil preparation. Choosing the right seeds is paramount. You need fresh, viable, unroasted groundnut seeds. Do not attempt to plant roasted or processed peanuts from the grocery store, as these will not germinate. Look for raw, in-shell peanuts, or shelled but intact kernels. It’s best to source seeds from a reputable nursery or seed supplier that specializes in garden seeds, ensuring they are intended for planting and not for consumption. In Bengaluru, local agricultural stores or specific seed vendors might offer varieties well-suited to the regional climate. Consider varieties known for good yield and resistance to common pests and diseases. Some common Indian varieties like TMV-2, JL-24, or Dhana (ICGS 11) might be available or similar local varieties that perform well in similar conditions. While you can plant unshelled peanuts, shelling them just before planting can sometimes improve germination rates, just be careful not to damage the delicate embryo. Once you have your seeds, turn your attention to the soil. As mentioned, groundnuts thrive in loose, sandy loam. If you have heavy clay soil, it’s imperative to amend it generously. Incorporate plenty of organic matter such as well-rotted compost, coco peat, or aged cow dung manure. These amendments will improve soil structure, enhance drainage, and provide essential nutrients. Adding sand can also help lighten heavy soils. For those with naturally sandy soils, organic matter will improve water retention and nutrient availability. A good rule of thumb is to work in at least a 2-4 inch layer of compost into the top 6-8 inches of your garden bed. A soil test is highly recommended to determine your soil’s pH and nutrient profile. Groundnuts prefer a pH between 5.9 and 7.0. If your soil is too acidic (low pH), you can raise it by adding agricultural lime. If it’s too alkaline (high pH), you can lower it with elemental sulfur or organic matter. Since groundnuts are nitrogen-fixers, avoid adding excessive nitrogen fertilizer during soil preparation. Instead, focus on phosphorus and potassium, which are crucial for flower and pod development. A balanced organic fertilizer with a lower nitrogen content (e.g., 5-10-10 or 0-20-20) can be incorporated if your soil test indicates deficiencies. Prepare your planting beds by tilling or digging the soil to a depth of at least 8-12 inches, breaking up any clumps and ensuring a fine, crumbly texture. For compact spaces or challenging soil, consider building raised beds and filling them with an ideal soil mix. This preparation step is fundamental for giving your groundnut plants the best possible start. https://ecorganicas.org/category/organic/ The Art of Planting: Spacing, Depth, and Timing With your seeds ready and soil perfectly prepared, it’s time for the exciting part: planting! Timing is everything when it comes to groundnuts, especially in a climate like Bengaluru’s. The ideal time for planting groundnuts in Bengaluru is typically after the main monsoon season, around September to October, when the heavy rains have subsided but the soil retains residual moisture and temperatures are consistently warm. Another suitable window is late February to March, leading into the hot summer months before the onset of the next monsoon. Aim to plant when soil temperatures are consistently above 18°C (65°F), which is crucial for good germination. Avoid planting during periods of heavy, continuous rainfall as this can lead to seed rot and fungal issues. Groundnuts are best direct-sown into the garden bed. Starting them indoors is generally not recommended as they dislike root disturbance during transplanting. Before planting, ensure the soil is lightly moist, but not waterlogged. Plant the shelled groundnut seeds (or unshelled, if preferred) about 1 to 2 inches deep into the prepared soil. The critical aspect here is spacing, which depends on whether you’re growing bunch or runner varieties. For bunch (bush) varieties, which grow more upright and compactly, plant seeds approximately 6 to 8 inches apart within the row. If planting multiple rows, space the rows about 24 to 30 inches apart. This spacing allows for adequate air circulation and provides room for the pegs (the structures that carry the fertilized flowers into the soil to form pods) to penetrate the soil. For runner varieties, which spread out significantly, you’ll need more space. Plant these seeds about 10 to 12 inches apart within the row, and space rows a generous 36 to 48 inches apart. This wider spacing accommodates their sprawling growth habit and ensures ample room for pod development along their runners. After placing the seeds, gently cover them with soil and lightly pat down. Water the newly planted area immediately and thoroughly to settle the soil around the seeds. Consistent moisture is vital during the germination phase, which usually takes about 7 to 14 days, depending on soil temperature and seed viability. Keep the soil consistently moist, but never soggy, until seedlings emerge. Once sprouted, ensure they receive ample sunlight – groundnuts need full sun, at least 6-8 hours daily, to thrive and produce a good harvest. Proper spacing and timely planting will lay a strong foundation for a healthy and productive groundnut crop. Nurturing Your Groundnut Plants: Care and Maintenance Once your groundnut seedlings have emerged and established themselves, the real nurturing begins. Consistent care is crucial for a bountiful harvest, and understanding the specific needs of these unique plants will set you up for success. Watering: Groundnuts require consistent moisture, particularly during their critical growth stages: flowering and pod development. In Bengaluru’s climate, this means regular watering, especially during dry spells. Aim for deep watering that moistens the soil to a depth of several inches. As a general guideline, provide about 1 to 1.5 inches of water per week, either from rainfall or irrigation. Avoid overhead watering late in the day, which can encourage fungal diseases. Drip irrigation or watering at the base of the plants is ideal. Reduce watering as the plants approach maturity and harvest time, as excessively wet soil can lead to pod rot and hinder the curing process. Weeding: Weeds compete with groundnut plants for water, nutrients, and sunlight, significantly impacting yield. Regular weeding is essential, especially in the early stages of growth. However, be extremely gentle when weeding around groundnut plants. Their delicate pegs, which develop from flowers and penetrate the soil to form peanuts, are easily disturbed. Avoid deep cultivation or aggressive hoeing near the plants. Hand-weeding is often the safest method. A layer of mulch can also help suppress weeds, conserve soil moisture, and regulate soil temperature. Hilling or Earthing Up: This is a critical step for groundnut cultivation. After the plants have flowered (usually 4-6 weeks after planting), you’ll notice small yellow flowers above ground. These flowers self-pollinate, and then a unique structure called a “peg” emerges from the base of the spent flower, elongating and growing downwards. These pegs must penetrate the soil to form the actual groundnut pods. To facilitate this, once the plants start flowering and pegs begin to form, gently hill or “earth up” soil around the base of the plants. This means mounding loose soil around the stems, creating a soft bed for the pegs to enter. This process ensures the developing pods have a loose, dark environment to grow in and also helps anchor the plants. Repeat hilling as needed, ensuring pegs are covered. Pest and Disease Management: While relatively hardy, groundnuts can be susceptible to certain pests and diseases. Common pests in Indian gardens include aphids, leaf miners, and sometimes white grubs. Regularly inspect your plants for signs of infestation. For aphids, a strong spray of water or neem oil solution can be effective. Organic pest control methods are always preferred in a home garden. Fungal diseases like leaf spot and rust can occur, especially in humid conditions. Ensure good air circulation, avoid overwatering, and consider planting disease-resistant varieties. For severe fungal issues, organic fungicides derived from copper or sulfur can be used. https://ecorganicas.com/ Fertilization: As nitrogen-fixers, groundnuts generally require minimal nitrogen. Excessive nitrogen promotes lush foliage at the expense of pod production. Instead, focus on providing phosphorus and potassium, which are crucial for flower and pod development. If your soil test indicated deficiencies, a low-nitrogen, high-phosphorus/potassium organic fertilizer can be applied during flowering. Bone meal or rock phosphate can provide phosphorus, while wood ash or kelp meal can supply potassium. Always follow package instructions and avoid over-fertilizing. Harvesting Your Bountiful Groundnut Crop The culmination of your hard work and patience arrives with the harvest, arguably the most exciting part of growing groundnuts. Knowing exactly when and how to harvest is crucial to ensure optimal flavour, texture, and storage life. Groundnuts typically take anywhere from 90 to 150 days to mature, depending on the variety and growing conditions. Signs of Maturity: There are several key indicators that your groundnuts are ready for harvest: 1. Yellowing Leaves: The most prominent sign is the yellowing and wilting of the plant’s foliage. The leaves will start to fade from vibrant green to a dull yellow, signaling that the plant is diverting its energy from leaf production to maturing the underground pods. 2. Inner Shell Darkening: This is the most reliable indicator, but it requires a bit of detective work. Gently dig up a few test pods from different plants. Break open the shells and inspect the inside. If the inner shell lining has turned from white to a light tan or brown colour, the groundnuts are likely ready. If it’s still white, they need more time. 3. Pod Development: The peanuts inside the pods should be plump and well-filled. If they feel shriveled or small, allow them to continue maturing. 4. Root Attachment: When you pull up a test plant, the groundnuts should be firmly attached to the roots. Harvesting Technique: Once you’ve determined your groundnuts are ready, choose a dry, sunny day for harvesting. This is important for the initial curing process. The method involves carefully digging up the entire plant. 1. Loosen the Soil: Use a garden fork or spade to gently loosen the soil around the base of the plant. Be cautious not to pierce or damage the developing pods. 2. Pull the Plant: Carefully pull the entire plant out of the ground. The groundnuts will be clinging to the roots in clusters. 3. Shake Off Excess Soil: Gently shake the plants to remove as much loose soil as possible from the roots and pods. Avoid washing the pods at this stage, as moisture can lead to mold during curing. Curing Process: This is perhaps the most critical step after harvesting, as it significantly impacts the flavour, texture, and storage quality of your groundnuts. Curing involves drying the groundnuts in two stages: 1. Initial Drying (Field Curing): After shaking off the soil, leave the entire plants (with pods still attached) in a sunny, dry, well-ventilated area for a few days. You can pile them in small windrows or hang them from a line. The goal is to allow the leaves and stems to dry out, transferring remaining nutrients into the pods. Protect them from rain or excessive dew. This stage typically lasts 3-7 days, depending on weather. 2. Final Drying (Hanging/Rack Curing): Once the leaves are brittle, remove the pods from the plants. Spread them in a single layer on screens, racks, or hang them in mesh bags in a cool, dark, well-ventilated area (like a shed or garage). Ensure good air circulation to prevent mold. This stage can take 2-4 weeks. The groundnuts are fully cured when the shells are brittle, and the kernels are firm and crunchy. The moisture content should be around 8-10% for optimal storage. Storage: Once thoroughly cured, store your groundnuts in their shells in airtight containers in a cool, dark, dry place. Stored properly, they can last for several months. Shelled groundnuts have a shorter shelf life and are best kept in the refrigerator or freezer. Congratulations on your homegrown bounty! https://ecorganicas.org/privacy-policy/ Comparison of Groundnut Varieties for Home Gardeners Choosing the right groundnut variety can significantly impact your garden’s yield and your personal enjoyment. While commercial farmers prioritize high-yield and disease resistance, home gardeners in Bengaluru might also consider factors like taste, maturity time, and suitability for smaller spaces. Here’s a comparison of common types and considerations: Variety Type / Characteristic Growth Habit Maturity Period Yield Potential Best Suited For Spanish Type (e.g., JL-24, TMV-2) Bunch/Bush, upright growth 90-110 days (early) Moderate to High Snacking, peanut butter, quick harvest, smaller gardens. Good oil content. Virginia Type (e.g., Virginia Bunch) Runner, spreading growth 130-150 days (late) High Boiled peanuts, large roasted peanuts, higher yields, larger gardens. Runner Type (e.g., Georgia Green, often commercial) Runner, extensive spreading 120-140 days (medium-late) Very High Commercial production, peanut butter, large gardens. Excellent uniformity. Valencia Type (e.g., Valencia A) Bunch/Bush, upright, multiple pods per shell 90-110 days (early) Moderate Boiled peanuts, fresh consumption, good for arid regions, typically 3-5 kernels per pod. For Bengaluru gardeners with limited space, Spanish or Valencia types are often preferred due to their compact, bunching growth habit and quicker maturity. They are excellent for fresh snacking, making them a delightful addition to any home garden. If you have more space and are looking for a larger harvest, a Virginia or Runner type might be more suitable, though they require a longer commitment. Always try to source seeds that are specifically adapted to your local climate for the…
 - how to plant carrots
 how to plant carrots How to Plant Carrots There’s an undeniable magic in pulling a vibrant, crisp carrot from the earth, its earthy scent filling the air, a testament to your hard work and nature’s bounty. For many gardeners, especially here in the bustling urban landscape of Bengaluru, cultivating carrots feels like a true achievement. Beyond the sheer satisfaction, growing your own carrots offers a multitude of benefits that extend far beyond the garden bed. Imagine biting into a carrot that’s just hours old, bursting with a sweetness and crunch that store-bought varieties can rarely match. This isn’t just a fantasy; it’s an achievable reality for anyone willing to roll up their sleeves and delve into the art of carrot cultivation. The importance of homegrown produce, particularly in a city like Bengaluru, cannot be overstated. With increasing concerns about pesticide residues and the freshness of vegetables transported over long distances, having a patch of carrots in your backyard or even on your balcony provides peace of mind. Carrots are nutritional powerhouses, packed with beta-carotene (which converts to Vitamin A, vital for vision), antioxidants, dietary fibre, and essential minerals. Incorporating them into your daily diet can boost immunity, improve skin health, and support digestive wellness. And let’s not forget the economic advantage – a packet of seeds costs a fraction of what you’d spend on continuous purchases from the market, yielding a harvest that can last for weeks or even months if succession planted. Moreover, the act of gardening itself is therapeutic, connecting you with nature, reducing stress, and offering a wonderful outdoor activity for families. Teaching children how food grows, from seed to plate, fosters a deeper appreciation for healthy eating and environmental stewardship. This comprehensive guide is designed to equip Bengaluru gardeners, from novices to seasoned enthusiasts, with all the knowledge needed to successfully plant, grow, and harvest a bountiful crop of delicious carrots, tailored specifically to our unique climate and soil conditions. Get ready to transform your garden into a root vegetable haven and enjoy the unparalleled taste of your very own homegrown carrots! Understanding Your Soil and Climate for Carrots in Bengaluru The journey to a successful carrot harvest begins beneath the surface, quite literally, with the soil. Carrots are root vegetables, and their development is intimately tied to the quality and texture of the growing medium. For gardeners in Bengaluru, understanding the specific characteristics of our local soil and climate is paramount. Our tropical savanna climate, characterized by distinct wet (monsoon) and dry seasons, poses unique challenges and opportunities for carrot cultivation. The goal is to replicate, as much as possible, the ideal conditions carrots thrive in, even if your garden soil isn’t naturally perfect. Ideal Soil Composition Carrots demand a light, loose, well-draining, and stone-free soil. This is non-negotiable for producing long, straight, unblemished roots. When carrot roots encounter resistance – be it a rock, a clump of hard clay, or even a piece of undecomposed organic matter – they tend to fork, split, or become stunted and misshapen. A sandy loam is often cited as the perfect soil type. It allows the taproot to penetrate deep and grow uniformly, while also providing good drainage to prevent waterlogging, which can lead to root rot. The ideal pH for carrots is slightly acidic to neutral, between 6.0 and 7.0. Many parts of Bengaluru have naturally reddish, lateritic soils which can be quite clayey and compacted. These will require significant amendment to become suitable for carrots. Deep digging, often to a depth of 12-15 inches, is crucial to break up any hardpans and ensure ample space for root development. Remember, the deeper and looser your soil, the longer and straighter your carrots will be. 🔥 Our Trending Gardening Pickshow deep to plant potatoesdo plant cells have mitochondriawhen to plant garlicwhat to plant with tomatoeswhat plants like coffee grounds Bengaluru’s Climate and Carrot Cultivation While carrots are often considered a cool-season crop, many varieties can be successfully grown in Bengaluru with careful timing. The key is to avoid the peak heat of summer and the heavy, incessant rains of the monsoon, which can lead to waterlogging and disease. The best time to plant carrots in Bengaluru is typically from late September to February. This period follows the major monsoon season, offering cooler temperatures and drier conditions, which are ideal for germination and initial growth. Temperatures between 15°C and 25°C are optimal for carrot root development. Planting too early in the monsoon can result in seed wash-out or damping-off disease due to excessive moisture. Planting too late into the dry season might expose young seedlings to intense heat, which can cause bolting (premature flowering) or bitter-tasting roots. Consider providing partial shade during the hottest parts of the day if you’re pushing the planting window into warmer months. For more insights on soil health, refer to our article on https://ecorganicas.org/shop/. Choosing the Right Carrot Varieties for Your Garden With hundreds of carrot varieties available globally, selecting the right one for your Bengaluru garden can seem daunting. However, focusing on characteristics that thrive in our specific conditions, as well as your personal preferences, can simplify the choice. Carrot varieties differ significantly in shape, size, color, maturity period, and resistance to certain conditions. Understanding these differences will help you achieve the best possible harvest. Don’t be afraid to experiment with a few different types to discover what performs best in your microclimate and suits your culinary needs. Popular Varieties for Indian Conditions For the typical Bengaluru garden, especially if you have less-than-perfect soil or are growing in containers, certain varieties tend to perform better. The long, slender varieties like ‘Nantes’ and ‘Danvers’ are popular choices due to their sweet flavour and relatively good adaptability. ‘Nantes’ carrots are cylindrical, blunt-tipped, and grow about 6-7 inches long, known for their fine texture and sweetness. ‘Danvers’ are a bit more conical, slightly longer, and more robust, tolerating heavier soils better than some other types. If your soil is particularly heavy or you’re limited to shallower containers, consider ‘Chantenay’ or ‘Paris Market’ types. ‘Chantenay’ carrots are broad-shouldered and tapered, growing to about 4-6 inches, making them more forgiving in denser soils. ‘Paris Market’ carrots are small, round, and ideal for containers or very heavy clay, maturing quickly. For a touch of novelty and extra nutrients, explore coloured varieties like purple ‘Cosmic Purple’ or yellow ‘Yellowstone,’ which can add visual appeal and a different flavour profile to your meals. Always source your seeds from reputable suppliers to ensure quality and germination rates. You can find excellent seed options at 🛒 Shop Now 🛒 Shop Now . Open-Pollinated vs. Hybrid Seeds When selecting seeds, you’ll often encounter terms like ‘open-pollinated’ and ‘hybrid.’ Open-pollinated (OP) varieties are those that produce seeds that will grow true to type if pollinated by other plants of the same variety. This means you can save seeds from your OP carrots for future planting. Many heirloom varieties are open-pollinated. Hybrid (F1) seeds, on the other hand, are the result of cross-pollinating two different parent lines to create a plant with specific desirable traits, such as increased vigour, uniform size, or disease resistance. While hybrids often offer superior performance, their seeds generally won’t grow true to type if saved, meaning you’ll need to purchase new seeds each year. For a home gardener, both have their merits. If you’re keen on seed saving or traditional varieties, go for OP. If you prioritize uniformity and disease resistance, hybrids might be a better choice. Consider what attributes are most important for your gardening goals. For further reading on different vegetable varieties, check out https://ecorganicas.org/category/organic/. Preparing Your Garden Bed for Optimal Carrot Growth Proper bed preparation is the single most critical step to ensure a successful carrot harvest. Neglecting this stage almost guarantees misshapen, stunted, or forked carrots. Think of it as creating a luxurious, obstacle-free pathway for your carrots to grow long and straight. This process isn’t just about digging; it’s about amending, refining, and creating an environment where these root vegetables can thrive without encountering resistance. For Bengaluru’s often compacted and heavy soils, this step requires particular attention and effort. Soil Amendment Techniques Begin by clearing the chosen area of any weeds, debris, and existing plants. Next, it’s time for deep digging. Using a garden fork or spade, loosen the soil to a depth of at least 12-15 inches, and ideally deeper for long-rooted varieties. This might be a laborious task, but it’s essential. As you dig, remove every single stone, clod, or piece of woody debris you encounter. Even small pebbles can cause a carrot to fork. Once the soil is thoroughly loosened, it’s time for amendments. Incorporate a generous amount of well-rotted compost or aged manure. The key here is well-rotted – fresh manure can be too high in nitrogen, which encourages leafy growth at the expense of root development, and can also lead to forking. Compost improves soil structure, aeration, and drainage, while also providing a slow release of nutrients. Mix it thoroughly into the top 10-12 inches of soil. If your soil is particularly heavy clay, adding some coarse sand (not fine builder’s sand) can further improve drainage and texture, though compost is usually the primary amendment needed. Avoid adding too much nitrogen; a balanced fertilizer or one slightly higher in phosphorus and potassium is more appropriate. After amending, rake the bed smooth and level, breaking up any remaining small clumps of soil. The surface should be fine and crumbly, almost like a seed-starting mix, to allow tiny carrot seeds to make good contact with the soil and germinate easily. You can learn more about organic soil amendments at https://ecorganicas.com/. Raised Beds vs. In-Ground Planting For many Bengaluru gardeners, especially those dealing with challenging native soils or limited space, raised beds offer a significant advantage for growing carrots. In a raised bed, you have complete control over the soil mixture. You can fill it with an ideal blend of compost, topsoil, and sand, ensuring perfect drainage and a stone-free environment. Raised beds also warm up faster in spring, extend the growing season, and are easier on the back when it comes to weeding and harvesting. They also help prevent soil compaction from foot traffic. If you opt for in-ground planting, ensure your bed preparation is even more meticulous, focusing on deep digging and generous amendment. Consider double-digging if your soil is severely compacted. For a traditional in-ground plot, establishing permanent pathways to avoid stepping on the growing area will help prevent compaction. Regardless of your choice, the principle remains the same: create a deep, loose, fertile, and well-draining environment for those precious roots. For tips on building raised beds, read our article on https://ecorganicas.org/shop/. The Art of Sowing Carrot Seeds Sowing carrot seeds requires a delicate touch and a keen understanding of their specific needs. These tiny seeds are notoriously slow to germinate, and proper technique at this stage can significantly impact your success rate. Patience is a virtue when it comes to carrots, both in waiting for germination and in the critical process of thinning. Get this right, and you’re well on your way to a bumper crop. Direct Sowing vs. Transplanting (Why Direct Sowing is Best) Unlike many other vegetables, carrots absolutely prefer direct sowing into their final growing location. They develop a long taproot almost immediately after germination, and this taproot is very sensitive to disturbance. Transplanting carrot seedlings, even with the utmost care, almost invariably leads to stunted, forked, or misshapen roots due to damage to the fragile taproot. Therefore, always sow carrot seeds directly into your prepared garden bed or container. This ensures the taproot can grow straight down without interruption, resulting in those perfectly formed carrots we all desire. Prepare your soil thoroughly as discussed in the previous section to make direct sowing as successful as possible. Spacing and Depth Guidelines Carrot seeds are tiny, making even spacing a challenge. A common trick is to mix the seeds with a bit of fine sand or coffee grounds before sprinkling them along your row; this helps distribute them more evenly. Sow seeds thinly, about 1/4 to 1/2 inch deep, and about 1 inch apart in rows that are 12-18 inches apart. After sowing, gently cover the seeds with a fine layer of soil or compost and lightly pat down. Water gently using a fine spray to avoid dislodging the seeds. Keep the soil consistently moist during the germination period, which can take anywhere from 7 to 21 days, sometimes longer in cooler conditions. Drying out during this critical phase will significantly reduce germination rates. Once seedlings emerge and are about 1-2 inches tall, it’s time for the crucial step of thinning. Thin them to 2-4 inches apart, depending on the mature size of your chosen variety. This might seem brutal to remove perfectly healthy seedlings, but it’s absolutely necessary. Overcrowding leads to competition for resources, resulting in small, stunted roots. Snip rather than pull to avoid disturbing the roots of neighbouring plants. You can use the thinnings in salads! For more guidance on seed starting, refer to https://ecorganicas.com/gardening/. Companion Planting for Carrots Companion planting is a time-honoured technique that can enhance the health and productivity of your carrot patch. Certain plants can deter pests, attract beneficial insects, or improve soil conditions for carrots. Good companions for carrots include rosemary, sage, and marigolds, which can help repel the carrot rust fly. Lettuce and radishes, which mature quickly, can be interplanted; radishes can even help break up the soil, making it easier for carrots to grow, and they are harvested before carrots need the space. Chives and onions are also good companions, believed to deter various pests. Avoid planting carrots near dill or fennel, as these can inhibit carrot growth. By strategically placing companion plants, you can create a more resilient and productive garden ecosystem. Nurturing Your Carrot Patch: Watering, Weeding, and Pest Control Once your carrot seeds have germinated and been thinned, the next phase involves consistent care to ensure healthy root development. This includes diligent watering, careful weeding, and proactive pest and disease management. For Bengaluru gardeners, the fluctuating temperatures and humidity levels mean staying vigilant is key to protecting your crop from common adversaries. Consistent Watering Schedule Carrots require consistent moisture throughout their growth cycle. Irregular watering, particularly allowing the soil to dry out completely between waterings, can lead to cracked roots, bitterness, and even bolting. Aim to keep the soil consistently moist, but never waterlogged. Depending on the weather in Bengaluru, this might mean watering every day or every other day, especially during dry spells. The best way to check is to feel the top inch or two of soil; if it feels dry, it’s time to water. Deep watering is preferable to frequent shallow watering, as it encourages roots to grow deeper, making them more resilient. Use a soaker hose or drip irrigation to deliver water directly to the root zone, minimizing evaporation and keeping foliage dry, which can help prevent fungal diseases. Mulching can also significantly help in retaining soil moisture. Weeding and Mulching Strategies Weeds are the arch-nemesis of young carrots. They compete fiercely for water, nutrients, and sunlight, and can quickly overwhelm slow-growing carrot seedlings. Hand-weeding is the preferred method, especially when carrots are young, as hoes can easily damage shallow roots. Be gentle and remove weeds regularly. Once carrots are established and a few inches tall, applying a 2-3 inch layer of organic mulch (like straw, dried leaves, or wood chips) around the plants offers numerous benefits. Mulch suppresses weeds, conserves soil moisture, regulates soil temperature (keeping it cooler in Bengaluru’s heat), and slowly breaks down to enrich the soil. Ensure the mulch doesn’t directly touch the carrot crowns, as this can encourage rot. For effective weeding tips, consult https://ecorganicas.com/gardening/. Common Pests and Diseases in Bengaluru Even with the best care, carrots can fall prey to pests and diseases. In Bengaluru, common pests include aphids, which cluster on young foliage and can stunt growth, and root-knot nematodes, microscopic worms that cause galls on roots, leading to stunted and distorted carrots. For aphids, a strong jet of water or neem oil spray can be effective. Nematodes are harder to control; crop rotation and planting resistant varieties are the best defenses. Red spider mites can also be an issue during dry, hot periods. Fungal diseases like damping-off can affect seedlings in overly wet conditions, and various blights can attack foliage. Good air circulation, proper spacing, and avoiding overhead watering can help prevent fungal issues. Always inspect your plants regularly to catch problems early. If you notice any unusual symptoms, act quickly. For a comprehensive guide on organic pest control, check out our article on https://ecorganicas.org/shop/. Harvesting Your Homegrown Carrots Carrots are typically ready for harvest anywhere from 60 to 90 days after sowing, depending on the variety. The best way to tell if they’re ready is to gently brush away some soil from the top of a carrot to check its shoulder diameter. When they reach a size that looks good to you, they’re ready! Don’t wait too long, as overly mature carrots can become woody and lose flavour. To harvest, loosen the soil around the carrot with a fork, then grasp the greens firmly at the base and pull gently. If the soil is very loose, you might be able to pull them directly. Harvest as needed, and enjoy the freshest carrots you’ve ever tasted! Comparison of Popular Carrot Varieties for Bengaluru Gardeners Choosing the right carrot variety is crucial for success, especially when considering Bengaluru’s unique climate and soil. Here’s a comparison of some popular options that perform well in our region: Variety Root Shape & Size Ideal Soil Type Maturity (Days) Key Benefits for Bengaluru Nantes (e.g., Nantes Half Long) Cylindrical, blunt-tipped, 6-7 inches long Loose, sandy loam, well-drained 65-75 Sweet, tender, good for fresh eating. Adapts well to slightly heavier soils if amended. Danvers (e.g., Danvers 126) Conical, slightly tapered, 7-8 inches long Tolerates heavier soils, but still prefers…
Discover more from Ecorganicas
Subscribe to get the latest posts sent to your email.